Category: Uncategorized

  • How to Grow Thyme Indoors

    How to Grow Thyme Indoors

    Imagine having the delightful aroma of fresh thyme wafting through your home, even when the world outside is blanketed in snow. For both budding gardeners and seasoned green thumbs, learning to grow thyme indoors is an exciting opportunity to bring a slice of the Mediterranean into your living space, no matter the season. As a versatile herb that thrives with minimal fuss, thyme can grace your kitchen with its culinary magic and add a charming touch to your indoor garden.

    Whether you’re just starting your gardening journey or have a history of nurturing lush indoor plants, cultivating thyme indoors offers rewarding benefits for all. In this article, you’ll discover the essential steps to successfully grow thyme indoors, from choosing the right variety to perfecting your watering routine. With practical tips and expert advice, you’ll be well-equipped to ensure your thyme plant flourishes, providing you with a steady supply of fresh, fragrant leaves to enhance your meals and invigorate your senses.

    By the end of the article, you’ll have the confidence to transform a simple pot into a thriving thyme haven. You’ll learn how to provide optimal light conditions, tailor your care routine to suit thyme’s unique needs, and troubleshoot common issues to keep your plant healthy and vibrant. Let’s embark on this gardening adventure together, and soon, you’ll be harvesting your very own thyme, bringing both flavor and beauty into your home.

    Select a Suitable Thyme Variety

    Select a Suitable Thyme Variety

    Choosing the right thyme variety is crucial for successful indoor growth. Common thyme (Thymus vulgaris) is a popular choice due to its hardiness and versatile flavor.

    For those looking for something ornamental, lemon thyme (Thymus citriodorus) offers attractive foliage and a citrus aroma. It thrives in sunny spots and can bring a delightful fragrance to your indoor space.

    Consider using a well-draining potting mix, such as a blend of sand, perlite, and standard potting soil, to meet thyme’s requirements. Ensure your thyme plants have adequate drainage by using pots with drainage holes to prevent root rot.

    Watering should be done sparingly, as thyme prefers slightly dry conditions. Allow the top inch of soil to dry out between waterings to maintain optimal growth conditions.

    Prepare Well-Draining Potting Mix

    Prepare Well-Draining Potting Mix

    Creating a well-draining potting mix is essential for growing thyme indoors successfully. Start by selecting a high-quality potting soil as your base, which will provide the necessary nutrients and structure for the plant.

    To enhance drainage, mix in coarse sand or perlite, which helps prevent water from pooling at the roots. Aim for a ratio of about two parts potting soil to one part sand or perlite, ensuring your thyme’s roots have the aeration they need.

    Consider adding a small amount of organic material, such as compost, to boost nutrient levels in the mix. This not only enriches the soil but also helps maintain a light and fluffy texture, which is beneficial for thyme’s growth.

    Before planting, moisten the potting mix slightly to ensure it’s ready to support your thyme plant. This initial preparation will promote healthy root development and encourage your thyme to thrive indoors.

    Position in Sunny Windowsill

    Position in Sunny Windowsill

    When positioning thyme indoors, finding a sunny windowsill is crucial for its growth. Thyme thrives in bright light, so look for a spot that receives at least 6 to 8 hours of direct sunlight daily.

    Consider south or west-facing windows, as they typically provide the most consistent light. If natural light is insufficient, supplement with a grow light to ensure thyme receives adequate illumination.

    Ensure your thyme pot is placed securely on the windowsill to prevent any accidents. Keeping the pot elevated slightly on a tray or saucer can help with drainage and prevent water damage to windowsills.

    For those in regions with less sunlight during winter, rotate the plant regularly to promote even growth. This practice helps all sides of the plant receive equal light, maintaining a balanced shape and healthy development.

    Water Sparingly to Avoid Overwatering

    Water Sparingly to Avoid Overwatering

    Thyme thrives with minimal watering, making it an ideal candidate for those who often forget to water their plants. To avoid overwatering, allow the soil to become almost completely dry before adding more water. This can be checked by sticking your finger about an inch into the soil; if it feels dry, it’s time to water.

    When watering, aim to moisten the soil without soaking it, as thyme is sensitive to excessive moisture. It’s advisable to use a pot with drainage holes and a well-draining soil mix, such as one containing equal parts potting soil, sand, and perlite. This combination ensures excess water drains quickly, reducing the risk of root rot.

    Consider using a spray bottle to gently mist the soil surface, which can help prevent overwatering while ensuring the thyme receives enough moisture. Advanced gardeners often gauge the weight of the pot to determine when it needs water; a light pot indicates dry soil, while a heavier pot suggests it’s still moist. This skill can be particularly helpful as you become more familiar with your plant’s needs.

    For those looking to further optimize their watering routine, placing a humidity tray near your thyme can provide a gentle increase in air moisture without overwhelming the plant. This technique is especially useful in dry indoor environments, where thyme might struggle with low humidity. By following these practical steps, you’ll cultivate a thriving thyme plant indoors, ready to enhance your culinary creations.

    Prune Regularly for Bushy Growth

    Prune Regularly for Bushy Growth

    Regular pruning is essential for promoting bushy growth in your indoor thyme plants. By trimming the tips of the stems, you encourage the plant to branch out, leading to a fuller appearance.

    When you prune, use sharp, clean scissors or pruning shears to make precise cuts. Aim to cut just above a leaf node, as this is where new growth will emerge, enhancing the plant’s shape and density.

    Timing your pruning sessions is crucial; perform them every few weeks to continuously stimulate growth. Avoid cutting more than a third of the plant at once to prevent stress, ensuring your thyme remains healthy and vigorous.

    For those looking to maximize their harvest, consider pinching back the top leaves regularly. This technique not only promotes bushier growth but also provides a continuous supply of fresh thyme for culinary use.

    Conclusion: Growing Success with These Plants

    In cultivating thyme indoors, you’ve uncovered five key relationship concepts: nurturing growth through consistent care, understanding the environment needed for flourishing, recognizing the importance of patience, adapting to changing conditions, and celebrating small successes along the way. These principles don’t just apply to plants; they’re the cornerstone of healthy, thriving relationships.

    As you finish this journey, take an immediate step by choosing one relationship in your life to nurture with the same attention you’ve given to your thyme. Perhaps it’s a friend you’ve lost touch with, a partner needing a little extra love, or a family member you wish to connect with more deeply.

    Don’t let these insights drift away. Bookmark this article now, ensuring these valuable lessons are just a click away whenever you need a reminder. Remember, the seeds of relationship success are sown with dedication and care, and your efforts today will blossom into the strong connections of tomorrow. Embrace this journey with confidence and watch your relationships, much like your thyme, thrive and enrich your life.

  • How to Grow Peppers Indoors

    How to Grow Peppers Indoors

    In the world of gardening, few experiences are as rewarding as nurturing a pepper plant from seedling to harvest, especially when you’re doing it indoors. Whether you’re a beginner eager to bring a touch of nature into your home or an experienced gardener looking to expand your indoor plant repertoire, growing peppers inside offers a unique blend of challenge and satisfaction. Indoor pepper cultivation allows you to enjoy fresh produce year-round, regardless of the season, and provides a vibrant splash of color and life in your living space.

    Peppers, with their array of colors and flavors, are not just a feast for the taste buds but also a delight for the eyes. Growing them indoors can seem daunting at first, but with the right guidance, anyone can turn their windowsill into a thriving pepper haven. In this article, you’ll discover the secrets to selecting the perfect pepper varieties, creating a conducive indoor environment, and mastering the art of watering and feeding. With our step-by-step approach, you’ll be well-equipped to enjoy a bountiful indoor harvest that will make your culinary creations shine.

    Select Ideal Pepper Varieties

    Select Ideal Pepper Varieties

    Choosing the right pepper varieties is crucial for successful indoor gardening. Sweet bell peppers and compact dwarf varieties are excellent choices for beginners due to their adaptability and manageable size.

    Consider the space you have available, as some pepper plants can grow quite tall. Smaller varieties like ‘Jalapeño M’ or ‘Mini Bell’ thrive in indoor conditions and are perfect for pot cultivation.

    It’s important to select varieties that are disease-resistant to minimize care issues. Look for descriptions such as ‘disease-resistant’ or ‘compact growth’ on seed packets, which are ideal traits for indoor growing.

    For those looking for a challenge, try growing hot peppers like ‘Habanero’ or ‘Cayenne’. These varieties require slightly more attention, such as ensuring they receive adequate light and warmth, but they can be very rewarding.

    Prepare Well-Draining Potting Mix

    Prepare Well-Draining Potting Mix

    Creating a well-draining potting mix is crucial for the successful cultivation of peppers indoors. Peppers require a soil environment that allows for adequate moisture retention without becoming waterlogged, as excessive moisture can lead to root rot.

    To prepare your potting mix, start with a base of high-quality potting soil. Ensure that the base soil is free from pests and diseases, which can be detrimental to the health of your pepper plants.

    Incorporate materials that improve drainage, such as perlite or coarse sand, into the soil. These components help create air pockets, allowing roots to breathe and preventing compaction.

    For a nutrient boost, consider adding a small amount of organic compost or worm castings. This addition will provide essential nutrients while supporting beneficial microorganisms that enhance soil health.

    When watering your peppers, aim to keep the soil consistently moist but not soggy. It is wise to check the top inch of soil; if it feels dry, it’s time to water.

    Advanced gardeners may experiment with mixing in coconut coir for improved water retention while still maintaining good drainage. This material can help regulate moisture levels, making it especially useful in dry indoor environments.

    Plant Seeds at Correct Depth

    Plant Seeds at Correct Depth

    When planting pepper seeds indoors, it’s crucial to plant them at the correct depth to ensure optimal germination. Generally, pepper seeds should be planted about 1/4 inch deep in the potting mix. This depth allows the seeds to access both moisture and warmth from the soil, which are essential for germination. If seeds are planted too deeply, they may struggle to reach the surface, while shallow planting can result in drying out.

    Use a pencil or your finger to create small indentations in the soil for each seed. Place one seed in each indentation and gently cover it with soil, ensuring it’s firmly in contact with the surrounding mix. This contact is important because it allows the seed to absorb water effectively. For advanced gardeners, consider using a seed starting tray with cells, which helps maintain consistent depth and spacing.

    After planting, water the seeds lightly, ensuring that the soil remains moist but not waterlogged. It’s helpful to cover the container with a clear plastic lid or wrap to retain humidity, which is crucial for seed germination. Remove the cover once you see the first signs of sprouting to prevent mold growth. Monitoring the moisture level daily will help you avoid overwatering, which is a common mistake when starting seeds indoors.

    Consider providing gentle bottom heat using a heat mat, which can significantly improve germination rates for pepper seeds. Peppers thrive in warm conditions, and maintaining a soil temperature between 70-80°F can speed up the sprouting process. For those without a heat mat, placing the seed tray on top of a refrigerator or near a warm appliance can offer a similar effect. Remember, consistent warmth and moisture are key to successfully growing peppers from seed indoors.

    Ensure Adequate Sunlight Exposure

    Ensure Adequate Sunlight Exposure

    Ensuring adequate sunlight exposure is crucial for growing healthy peppers indoors. Peppers thrive best in environments where they can receive at least 12 to 16 hours of light daily to simulate their natural growth conditions.

    Position your pepper plants near a sunny window, preferably one facing south or west, to maximize light exposure. If natural light is insufficient, consider using full-spectrum grow lights to supplement their lighting needs.

    It’s important to place grow lights approximately 6 to 12 inches above the plants to avoid burning the leaves while providing enough light intensity. Adjust the height of the grow lights as your peppers grow to maintain the ideal distance and ensure even light distribution.

    For those looking to take their pepper growing to the next level, consider using a timer to automate the lighting schedule. This ensures that your peppers receive consistent light, promoting robust growth and fruitful yields.

    Maintain Optimal Watering Routine

    Maintain Optimal Watering Routine

    Watering peppers indoors involves more than just pouring water over the soil; it’s about understanding the plant’s needs. Peppers prefer a consistent moisture level, so aim to water when the top inch of soil feels dry to the touch.

    Consider using a well-draining potting mix to prevent waterlogging, which can lead to root rot. A mix containing perlite or sand can improve drainage, ensuring your peppers thrive under your care.

    It’s important to adjust your watering routine based on the plant’s growth stage. While young seedlings may require daily attention, mature plants typically need watering every 2-3 days, depending on humidity and temperature.

    To ensure even moisture distribution, water your peppers until excess drains from the bottom of the pot. This practice not only helps the roots absorb water effectively but also prevents salt buildup in the soil, which can harm your plants over time.

    Conclusion: Growing Success with These Plants

    In nurturing the vibrant world of indoor pepper plants, we’ve uncovered five vital relationship concepts: understanding the needs of your plants, creating a nurturing environment, being patient and attentive, fostering growth through consistent care, and celebrating the fruits of your labor. These principles mirror the nurturing required in our human connections, emphasizing the importance of attentiveness, patience, and consistent effort.

    As you embark on your indoor pepper-growing journey, consider integrating these concepts into your relationships. Begin by choosing one relationship in your life that could benefit from a little extra care and apply these nurturing principles. Whether it’s spending more quality time, actively listening, or simply expressing gratitude, taking a small step today can lead to flourishing relationships tomorrow.

    Don’t forget to bookmark this article for easy access, ensuring these valuable insights are always at your fingertips. By saving this guide, you’re investing in both your gardening success and the strengthening of your personal connections.

    Remember, just like a well-tended pepper plant, relationships thrive with care and attention. With each step you take, you’re cultivating a future of blooming relationships that will enrich your life for years to come.

  • How to Grow Sweet Basil Indoors

    How to Grow Sweet Basil Indoors

    There’s something truly magical about nurturing a plant to life, and what better way to start than with sweet basil? Whether you’re a newcomer to the world of indoor gardening or a seasoned green thumb, growing basil indoors can be a delightful and rewarding experience. This aromatic herb, known for its vibrant green leaves and distinctive flavor, can transform your kitchen into a fragrant oasis, all while providing a fresh supply of leaves for your culinary creations.

    Understanding the essentials of indoor basil cultivation can make all the difference between a flourishing plant and one that struggles to survive. In this guide, you’ll discover practical tips on everything from selecting the right container to creating the perfect lighting conditions. We’ll delve into watering techniques and the ideal soil mix, ensuring your basil plant thrives in its indoor environment. By the end of this article, you’ll be equipped with the knowledge to grow lush, healthy basil that will not only enhance your dishes but also bring a piece of nature into your home.

    Select a Suitable Pot

    Select a Suitable Pot

    Choosing the right pot for your sweet basil is crucial to its success indoors. Start by selecting a pot that is at least 6-8 inches deep, which allows the roots ample space to grow.

    Consider a pot with drainage holes to prevent water from accumulating at the bottom, which can lead to root rot. If your chosen container doesn’t have drainage, you can add a layer of gravel or small stones at the base to improve drainage.

    Material matters when selecting a pot. Clay or terracotta pots are breathable and allow for better moisture regulation, while plastic pots retain moisture longer, which can be beneficial in drier indoor environments.

    For those who are more experienced, self-watering pots can be a great option to maintain consistent moisture levels, especially if you’re not home to water frequently. Ensure the pot’s size matches your space and aesthetic preferences, as this will encourage you to take pride in your indoor garden.

    Use Well-Draining Potting Mix

    Use Well-Draining Potting Mix

    To grow sweet basil indoors successfully, it’s crucial to use a well-draining potting mix. This type of soil prevents water from accumulating around the roots, which can lead to root rot—a common issue for indoor basil plants.

    For beginners, a pre-mixed potting soil designed for herbs or vegetables is an excellent choice. These mixes are typically light and contain a blend of peat, perlite, and vermiculite, promoting proper drainage and air flow.

    Advanced gardeners might consider creating their own potting mix by combining equal parts of peat moss, perlite, and compost. This custom mix ensures that your basil receives the right nutrients while maintaining the necessary drainage characteristics.

    Regardless of the mix you choose, make sure your pot has drainage holes to allow excess water to escape. Water your basil when the top inch of soil feels dry to the touch, usually requiring a drink once or twice a week depending on your indoor climate.

    Plant Seeds at Correct Depth

    Plant Seeds at Correct Depth

    When planting sweet basil seeds indoors, it’s essential to plant them at the correct depth to ensure optimal germination. Generally, basil seeds should be sown about 1/4 inch deep, which means they are lightly covered with soil, allowing them to access enough light and moisture.

    To achieve the right planting depth, gently press the seeds into the potting mix with your fingertip or the back of a spoon. This practice not only ensures proper seed-to-soil contact but also prevents seeds from being buried too deeply, which can hinder their ability to sprout.

    Once the seeds are planted, cover them with a thin layer of soil and mist with water to keep the surface moist but not soggy. Moisture is crucial during the germination phase, so consider using a spray bottle to maintain consistent humidity without disturbing the seeds.

    For those with more experience, consider using a humidity dome or a plastic cover to retain moisture and warmth, accelerating germination. Ensure that the seeds are kept at an ideal temperature range of 70-75°F (21-24°C) to promote successful sprouting.

    Ensure Adequate Indoor Light

    Ensure Adequate Indoor Light

    When growing sweet basil indoors, providing adequate light is crucial for its health and flavor. Basil generally requires around six to eight hours of direct sunlight daily for optimal growth.

    Position your basil near a south-facing window to ensure it receives enough natural light. If natural light is insufficient, consider using supplemental grow lights to provide the necessary illumination.

    LED grow lights are an excellent choice as they are energy-efficient and can be adjusted to provide the specific light spectrum that basil needs. Place the grow lights about 6 to 12 inches above the plant, adjusting the height as the plant grows to avoid leaf burn.

    It’s important to rotate the plant every few days to ensure even light exposure and prevent leaning. For advanced gardeners, using a light timer can automate the process, ensuring your basil receives consistent light without needing constant attention.

    Maintain Consistent Moisture Levels

    Maintain Consistent Moisture Levels

    Maintaining consistent moisture levels is crucial for growing sweet basil indoors. The key is to keep the soil slightly moist but not waterlogged, as basil is prone to root rot in overly wet conditions.

    Using a well-draining potting mix can help achieve the optimal moisture balance. Consider adding some perlite or coarse sand to your potting soil to improve drainage and prevent water from accumulating at the bottom of the pot.

    It’s important to check the soil moisture regularly. Insert your finger about an inch into the soil; if it feels dry at this depth, it’s time to water your basil plant.

    For beginners, watering once a week is a good starting point, but this can vary depending on your indoor climate. More experienced gardeners might consider using a moisture meter for more precise measurements, especially in fluctuating indoor environments.

    Conclusion: Growing Success with These Plants

    In nurturing your indoor sweet basil, we’ve explored five pivotal relationship concepts: providing the right environment, understanding needs, consistent care, communication through observation, and patience in growth. Just as sweet basil flourishes with the right conditions, so too do our relationships thrive when we tend to them with understanding and dedication.

    As an actionable next step, take a moment to assess the “environment” of your closest relationships. Are they receiving the attention and care needed to flourish? Initiate a small act of kindness or a meaningful conversation today to reinforce those bonds.

    Remember, every great relationship is a living, growing entity that requires ongoing nourishment. Bookmark this article now, so you can revisit these nurturing tips whenever your relationships need a little extra love and attention.

    Looking forward, envision the success of your relationships as a flourishing garden, rich with growth and connection. With consistent effort and care, you’re on the path to cultivating meaningful, lasting bonds. Embrace this journey with confidence and watch your relationships bloom.

  • How to Grow Green Onions Indoors

    How to Grow Green Onions Indoors

    Imagine having the fresh, crisp flavor of green onions at your fingertips, ready to elevate any dish with their subtle yet delightful bite. Growing green onions indoors is not just a practical endeavor but a rewarding journey that invites a touch of nature into your home, regardless of your gardening experience. Whether you’re a curious beginner eager to start your indoor gardening adventure or a seasoned green thumb looking to expand your indoor crop selection, cultivating green onions provides a fruitful and manageable project.

    In this article, you’ll discover how to transform a simple windowsill into a thriving mini-garden filled with vibrant green onions. We’ll guide you through selecting the right containers, understanding the ideal growing conditions, and harvesting with confidence. By the time you reach the end, you’ll be equipped with all the knowledge you need to nurture these versatile plants and enjoy their fresh taste year-round. Get ready to embrace the joy of indoor gardening and watch your green onions flourish, knowing you’re just a few steps away from a sustainable and satisfying harvest.

    Select Healthy Green Onion Bulbs

    Select Healthy Green Onion Bulbs

    When selecting green onion bulbs, look for those that are firm to the touch and free from any signs of mold or decay. Avoid bulbs with soft spots or discoloration, as these are indications of poor health and reduced viability.

    Choose bulbs that have a crisp, white base and vibrant green tops, if still attached. This ensures they are fresh and ready to thrive once planted indoors.

    For best results, opt for bulbs that are similar in size, ensuring uniform growth and making care more consistent. Smaller bulbs tend to establish faster, while larger ones might take longer but can produce more substantial yields.

    Advanced gardeners might consider experimenting with heirloom or organic bulbs for a unique flavor and growing experience. These can often be found at local farmers’ markets or specialized gardening stores, providing an opportunity to grow something a bit different.

    Once your bulbs are selected, prepare them for planting by gently peeling away any loose outer layers. This simple step helps prevent rot and ensures the bulb can absorb water and nutrients effectively.

    Prepare a Suitable Container

    Prepare a Suitable Container

    Choosing the right container is crucial for successfully growing green onions indoors. The container should be at least 6 inches deep to accommodate root growth, ensuring your onions have ample space to thrive.

    Consider using a pot with drainage holes to prevent water from accumulating at the bottom, which can lead to root rot. If your chosen container lacks drainage, you can add a layer of pebbles or small stones at the bottom to enhance drainage.

    Select a container made from materials like clay, ceramic, or plastic, as these can effectively retain moisture while allowing some air circulation. Ensure the container is large enough to plant multiple bulbs, spacing them about 1 to 2 inches apart for optimal growth.

    Pro tip: Use a high-quality potting mix that is well-draining yet retains enough moisture for green onions. Mix in some organic compost or slow-release fertilizer to provide essential nutrients throughout the growing period, promoting healthy and robust onion growth.

    Plant Bulbs with Correct Spacing

    Plant Bulbs with Correct Spacing

    When planting green onion bulbs indoors, ensuring proper spacing is crucial for healthy growth. Aim to place each bulb about one to two inches apart in your container to allow ample room for root and leaf development.

    Spacing bulbs correctly helps prevent overcrowding, which can lead to pest issues and poor air circulation. Overcrowded plants may compete for nutrients and water, so maintaining the recommended distance helps each bulb thrive.

    For beginners, using a ruler or a small stick marked with the appropriate spacing can be a handy tool to achieve uniform planting. More experienced gardeners might find that aligning the bulbs in a grid pattern helps maximize space in any container size.

    In addition to spacing, consider the depth at which you plant the bulbs. Plant them with just the tips of the bulbs exposed above the soil to encourage faster sprouting and robust growth. This method ensures that the bulbs receive adequate light and warmth, which are essential for indoor cultivation.

    Provide Adequate Light and Water

    Provide Adequate Light and Water

    To ensure your green onions thrive indoors, providing adequate light is crucial. Place your pots on a sunny windowsill that receives at least six hours of direct sunlight each day for optimal growth.

    If natural light is insufficient, consider using grow lights to supplement the lighting needs of your green onions. Position the grow lights about 6 inches above the plants and keep them on for 12 to 16 hours daily to mimic natural sunlight.

    Watering your green onions correctly is just as important as providing light. Keep the soil consistently moist but not waterlogged by watering thoroughly when the top inch of soil feels dry to the touch.

    For best results, use a pot with drainage holes to prevent excess water from accumulating and causing root rot. A well-draining soil mix, such as a combination of potting soil and perlite, will further ensure proper moisture balance.

    Remember, overwatering is a common mistake with indoor plants, so it’s essential to monitor the moisture levels regularly. Employing a simple finger test or a moisture meter can help you maintain the right moisture balance, especially for those new to gardening.

    Harvest and Regrow Continuously

    Harvest and Regrow Continuously

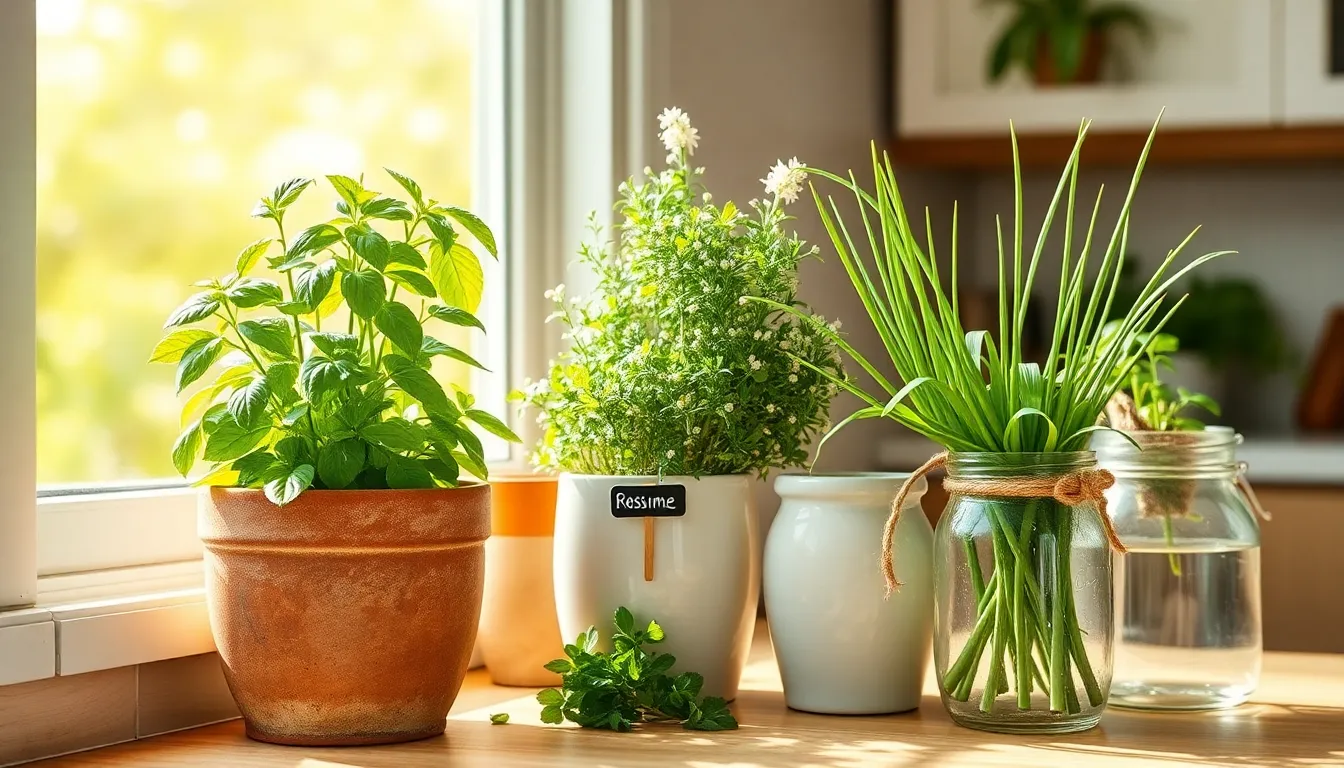
    Green onions are one of the easiest plants to harvest and regrow, making them perfect for a continuous indoor gardening project. Once you’ve snipped the green tops for use in your kitchen, leave about an inch of the white base intact.

    Simply place the white bases in a glass of water, ensuring the roots are submerged, and watch them regrow within days. Change the water every few days to keep it fresh and prevent any unpleasant odors.

    For a more sustainable approach, you can plant the white bases in a pot with soil once they’ve developed new roots. Use a well-draining potting mix, such as one containing equal parts peat moss, perlite, and vermiculite, to provide the best environment for growth.

    To maximize your harvest, ensure your green onions receive consistent light, ideally from a south-facing window or under a grow light. If you’re using a grow light, aim for about 12 to 14 hours of light per day to mimic the conditions of the growing season.

    Advanced gardeners might try experimenting with different container sizes to see how it affects growth. A larger pot can allow for multiple onion bases to thrive, providing a more bountiful harvest.

    Conclusion: Growing Success with These Plants

    As we draw our exploration of nurturing green onions indoors to a close, let’s reflect on the five key relationship concepts that can cultivate more than just a thriving mini-garden. First, understanding the importance of a solid foundation in relationships is akin to selecting the right pot for planting. Next, consistent care and attention, much like watering your onions, keep the bonds strong and healthy. Communication, akin to providing the right light, ensures growth and prevents misunderstandings. Patience, crucial for both gardening and relationships, reminds us that progress takes time. Lastly, adaptability in relationships, just as in adjusting your plant’s environment, is vital for thriving amidst change.

    Now, take a moment to identify one relationship in your life that could benefit from a bit more nurturing. Apply one of these concepts today and witness the positive shift. Remember, small consistent actions lead to lasting growth.

    Bookmark this article as your go-to guide for fostering both your green onions and your relationships. As you continue this journey, envision a future where your relationships, much like a well-tended garden, flourish with abundance and joy. The seeds of success are in your hands—plant them wisely!