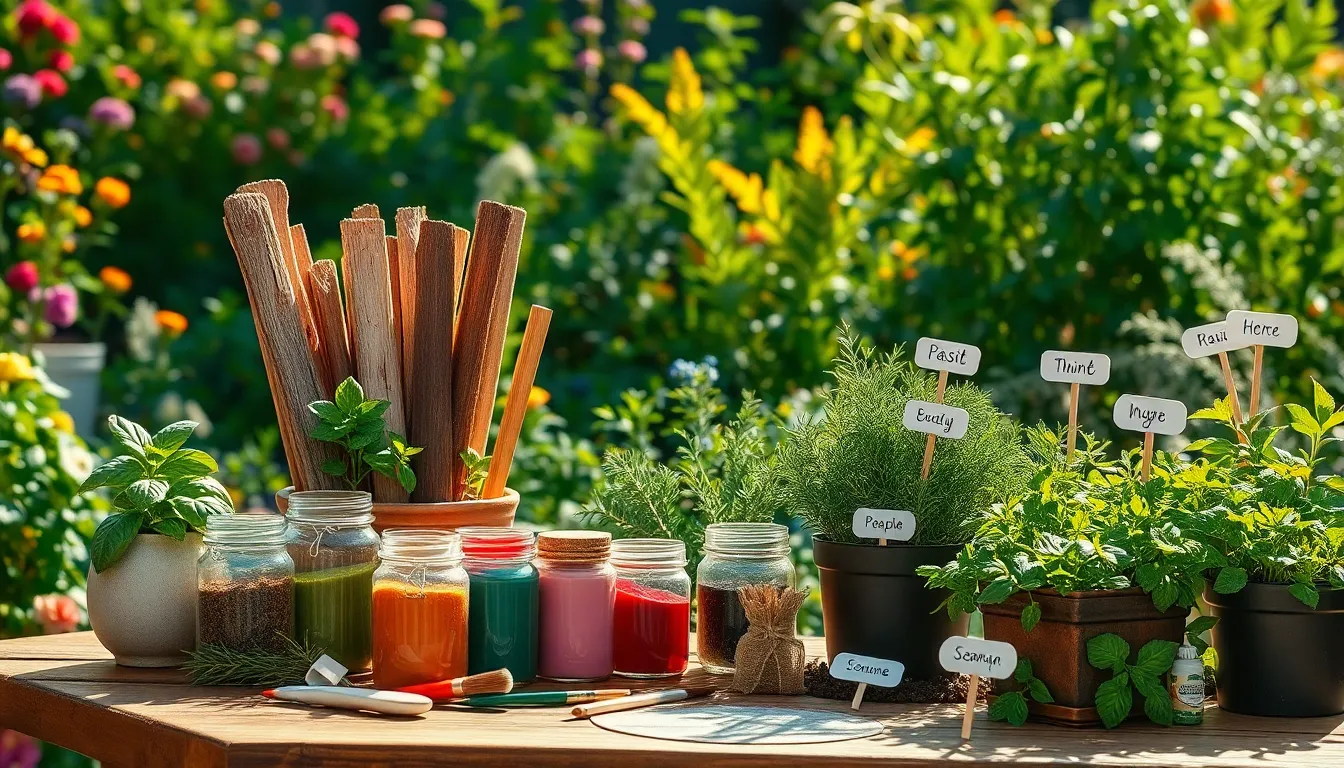
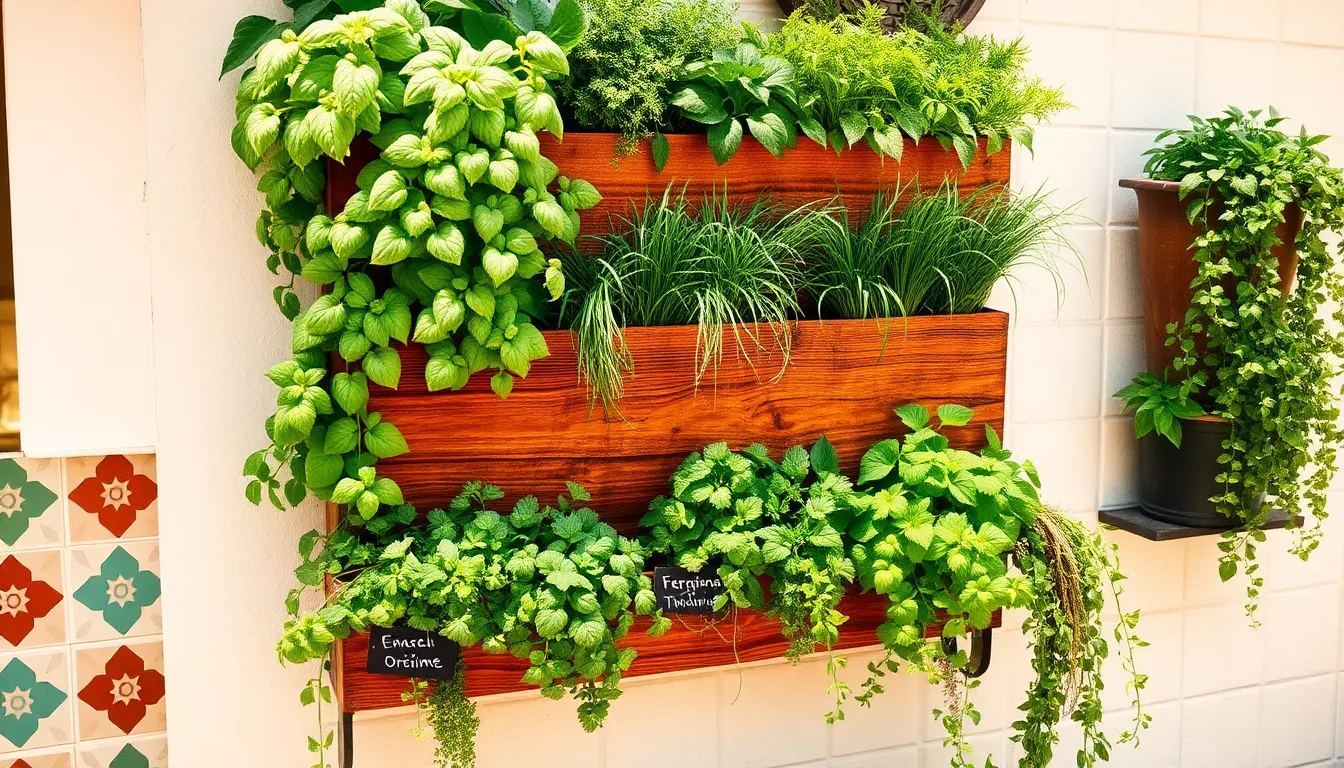
Category: Beginner Gardening Tips

  • How to Start an Herb Garden

    How to Start an Herb Garden

    Imagine stepping out into your backyard or onto your balcony, greeted by the vibrant scents of rosemary, basil, and mint. Whether you’re a seasoned gardener or just beginning to explore the wonders of growing your own plants, starting an herb garden can be an incredibly rewarding venture. Herbs are not only a feast for the senses but also a gateway to a more self-sufficient and flavorful lifestyle. From crafting delectable meals to brewing soothing teas, your homegrown herbs will become indispensable in your daily routine.

    The importance of cultivating an herb garden extends beyond culinary delights. Herbs have been cherished for centuries for their medicinal properties, aesthetic appeal, and ecological benefits. As you embark on this green journey, you’ll discover how to select the perfect herbs for your climate and space, whether it’s a sprawling garden or a cozy windowsill. Together, we’ll delve into practical tips on soil preparation, watering, and harvesting, ensuring that your herb garden thrives throughout the seasons.

    For beginners, we’ll keep things simple and stress-free, guiding you step-by-step through the process of planting and nurturing your first herbs. Experienced gardeners will find fresh insights into maximizing yields and experimenting with new herb varieties. By the end of this article, you’ll be equipped with the knowledge and confidence to cultivate a thriving herb garden that enhances both your home and lifestyle. Let’s dig in and unlock the secrets of successful herb gardening, transforming your outdoor space into a lush, aromatic haven.

    Select Ideal Herb Varieties

    Select Ideal Herb Varieties

    When selecting herbs for your garden, start with popular varieties like basil, parsley, and mint, as they are easy to grow and versatile in the kitchen. Consider your climate and the specific growing conditions of your garden to ensure your chosen herbs will thrive.

    Research each herb’s sunlight and water requirements; for instance, basil thrives in full sun, while mint prefers partial shade. Ensure that the soil is well-draining and rich in organic matter to support healthy growth for most herbs.

    For a more diverse herb garden, include both annuals, such as cilantro, and perennials, like rosemary, to enjoy a variety of flavors throughout the year. Advanced gardeners might experiment with less common herbs like lemon balm or tarragon for unique culinary possibilities.

    Group herbs with similar care needs together to simplify your gardening efforts. Regularly monitor your plants for pests and diseases, and use organic solutions to maintain a healthy garden ecosystem.

    Prepare Well-Draining Soil

    Prepare Well-Draining Soil

    To ensure your herb garden thrives, it’s critical to prepare well-draining soil. Start by assessing your current soil type, as herbs generally prefer a sandy or loamy composition that allows excess water to escape easily.

    Incorporating organic matter like compost or well-rotted manure is an excellent way to improve drainage and nutrient content. You can also add sand or perlite to clay-heavy soil to enhance its draining capabilities, preventing root rot.

    Consider using raised beds or containers to have more control over the soil composition and drainage. Raised beds can be filled with a custom mix of soil that promotes healthy root growth, making them a great option for areas with poor natural drainage.

    Regularly check the moisture level by inserting your finger an inch into the soil; it should feel slightly damp but not wet. Herbs like rosemary and thyme thrive in drier conditions, so ensure the soil dries out between waterings to mimic their natural environment.

    Choose Suitable Garden Location

    Choose Suitable Garden Location

    Locating the perfect spot for your herb garden is crucial for its success. Ideally, choose a location that receives at least six to eight hours of sunlight daily, as most herbs thrive in full sun.

    Observe your garden space throughout the day to understand the light patterns. If your garden lacks consistent sunlight, consider planting shade-tolerant herbs like mint or chives, or use reflective surfaces to maximize available light.

    Good air circulation is also important to prevent disease and promote healthy growth. Avoid areas that are prone to strong winds, which can cause stress and dehydration in herbs; use barriers such as hedges or fences if needed.

    Ensure your chosen location has easy access to water, making regular watering convenient and efficient. Herbs prefer moderately moist soil, so having a water source nearby will help maintain the proper moisture levels without overwatering.

    For those with limited space, consider using containers or vertical garden structures. This not only optimizes space but also allows you to move your herbs to follow the sun or bring them indoors during colder months.

    Plant Seeds or Seedlings

    Plant Seeds or Seedlings

    Deciding whether to start with seeds or seedlings is a crucial step in establishing your herb garden. Seeds offer a more economical option, allowing you to cultivate a wider variety of herbs, but they require more time and patience to grow.

    Purchasing seedlings, on the other hand, provides a head start since they are already partially grown. This approach is ideal for beginners who want quicker results and less initial effort.

    When opting for seeds, it’s essential to use a seed-starting mix, which is lighter than regular potting soil and promotes better drainage. Keep the soil consistently moist but not waterlogged, as this can cause seeds to rot.

    For those choosing seedlings, ensure you select healthy plants with vibrant foliage and avoid those with yellowing leaves or crowded roots. Transplant them into rich, well-draining soil and water thoroughly to help them establish quickly.

    Regardless of your choice, herbs like basil, cilantro, and parsley are excellent for beginners due to their forgiving nature and quick growth. More advanced gardeners might enjoy challenging themselves with rosemary or lavender, which require more specific conditions.

    • Ensure your chosen herbs receive at least 6-8 hours of sunlight daily.
    • Regularly check soil moisture levels; herbs prefer soil that is kept consistently moist but not soggy.
    • Consider starting seeds indoors if you’re in a cooler climate to extend the growing season.

    Establish a Watering Routine

    Establish a Watering Routine

    Establishing a consistent watering routine is crucial for the success of your herb garden. The first step is to understand the specific water needs of the herbs you have planted, as different herbs have varying requirements.

    Most herbs prefer well-draining soil, which means they don’t like to sit in waterlogged conditions. To maintain the right balance, water deeply but infrequently, allowing the top inch of soil to dry out between waterings.

    Consider watering your herbs early in the morning when the temperatures are cooler, reducing evaporation and giving plants time to absorb moisture before the day’s heat. If you’re unsure whether it’s time to water, a simple finger test can be a reliable guide—stick your finger into the soil up to the first knuckle; if it feels dry, it’s time to water.

    For more advanced care, pay attention to the specific needs of Mediterranean herbs like rosemary and thyme, which thrive with less water and more sun. Meanwhile, moisture-loving herbs such as basil and mint benefit from slightly more frequent watering, especially during hot, dry spells.

    Using a layer of mulch around your herbs can help retain soil moisture and reduce the frequency of watering. Monitor your plants for signs of stress such as wilting or yellowing leaves, which can indicate both over- and under-watering, and adjust your routine accordingly.

    Conclusion: Growing Success with These Plants

    As you embark on the rewarding journey of starting an herb garden, remember the valuable relationship lessons we’ve explored: communication through understanding plant needs, patience in nurturing growth, commitment to regular care, adaptability to changing conditions, and celebrating small successes along the way. Each of these principles not only enriches your garden but also strengthens the bonds in your personal relationships.

    To put these insights into practice, why not take a moment today to discuss with a loved one how you can apply these gardening lessons to deepen your connection? Perhaps plan a joint project that allows you both to grow together, much like your garden herbs.

    Don’t forget to save this article for future reflection and guidance. As your garden flourishes, you’ll want to revisit these concepts to keep your relationships thriving as well.

    Remember, successful relationships, like thriving gardens, require ongoing effort and attention. With dedication and care, you can cultivate connections that are as fresh and flavorful as your homegrown herbs. Embrace this opportunity to grow both your garden and your relationships, and look forward to a future rich with love and understanding.

  • How to Prune Fruit Trees

    How to Prune Fruit Trees

    In the heart of every fruitful garden lies the art and science of pruning fruit trees—a practice that promises to transform tangled branches into a thriving orchard. Whether you’re a novice gardener just beginning your horticultural journey or a seasoned green thumb, understanding how to prune effectively is essential for the health and productivity of your trees. This task, often viewed with apprehension, is your gateway to a bountiful harvest, breathing life into each branch with precision and care.

    Pruning is not merely about cutting away; it’s about nurturing growth and guiding nature’s course. By strategically removing specific limbs, you enhance sunlight penetration and air circulation, which are crucial for fruit development and disease prevention. In this article, we will demystify the pruning process, offering you step-by-step guidance that respects both the beauty and biology of your trees. You’ll discover the best tools for the job, the perfect timing for different fruit varieties, and techniques that will empower you to shape your trees confidently.

    Imagine your garden as a canvas, with each cut of the pruner a brushstroke that reveals the potential within. While the task may seem daunting at first, together we’ll explore how each snip contributes to a healthier, more productive tree. This journey will equip you not just with knowledge, but with the assurance to embrace pruning as a rewarding and transformative gardening skill. So, roll up your sleeves, and let’s embark on this horticultural adventure that promises to enrich both your garden and your soul.

    Select Appropriate Pruning Tools

    Select Appropriate Pruning Tools

    Choosing the right pruning tools is essential for maintaining the health and productivity of your fruit trees. Well-maintained tools not only make the job easier but also prevent damage to the trees.

    Start with a pair of high-quality bypass pruners, which are perfect for cutting small branches and stems. Ensure they are sharp and clean to make precise cuts that heal quickly, reducing the risk of disease.

    For thicker branches, anvil pruners or a pruning saw may be necessary. Anvil pruners work well for cutting dead wood, while a pruning saw can handle branches up to a few inches thick.

    Gardeners should also consider the comfort and ergonomics of their tools, especially for extended pruning sessions. Look for models with cushioned grips and lightweight materials to reduce fatigue.

    • Regularly oil and sharpen your tools to keep them in optimal condition.
    • Disinfect tools with a bleach solution or rubbing alcohol between cuts to prevent the spread of disease.
    • Store tools in a dry place to avoid rust and ensure longevity.

    Investing in quality tools can save you time and effort in the long run, making your pruning tasks more enjoyable. As you gain experience, consider expanding your collection to include specialty tools for specific tasks, such as pole pruners for high branches.

    Identify Dead or Diseased Branches

    Identify Dead or Diseased Branches

    To begin identifying dead or diseased branches, closely examine your fruit tree for signs of distress. Look for branches that are brittle, have no new growth, or exhibit unusual discoloration, as these are clear indicators of potential issues.

    Healthy branches should show signs of life, such as vibrant leaves and flexible wood. If a branch snaps easily or appears to have fungal growth, it’s likely dead or diseased and should be pruned away to maintain the tree’s health.

    It’s important to check for symptoms of disease, such as cankers, which are sunken areas of bark that may ooze sap. These areas can spread infection to other parts of the tree, so removing them promptly is crucial.

    Inspecting your tree regularly helps prevent the spread of disease, especially during the dormant season when the tree’s structure is more visible. By consistently monitoring and pruning unhealthy branches, you encourage stronger, more productive growth in your fruit trees.

    Remove Suckers and Water Sprouts

    Remove Suckers and Water Sprouts

    Once you’ve identified and removed dead or diseased branches, it’s crucial to address the growth of suckers and water sprouts. Suckers are shoots that emerge from the base of the tree or below the graft union, while water sprouts are vigorous shoots that grow vertically from branches or the trunk.

    Removing these unwanted growths helps direct the tree’s energy towards producing fruit, rather than excessive foliage. To effectively remove suckers, use sharp pruning shears and cut them as close to the point of origin as possible to prevent regrowth.

    Water sprouts can be pruned during the tree’s dormant season in winter or early spring, which minimizes stress on the tree. While cutting, ensure you make a clean cut at the base of the sprout to avoid leaving stubs that can lead to disease.

    For gardeners with more experience, consider using a pruning saw for thicker water sprouts on mature trees. Regularly inspect your fruit trees throughout the growing season, as suckers and water sprouts can grow rapidly and may require additional attention.

    Thin Out Overcrowded Branches

    Thin Out Overcrowded Branches

    Thinning out overcrowded branches is a crucial step in maintaining healthy fruit trees. When branches are too close together, they can restrict air circulation and sunlight penetration, leading to diseases and poor fruit production.

    Begin by identifying branches that cross or rub against each other, as these can cause wounds that invite pests and diseases. Use clean, sharp pruning shears to make precise cuts, ensuring you cut just above a bud to promote new growth.

    For beginners, focus on removing the smaller, weaker branches first to open up the tree’s canopy. This will help increase airflow and sunlight exposure, which are essential for healthy fruit development.

    Experienced gardeners can take it a step further by thinning out the center of the tree to create a “vase” shape. This advanced technique maximizes light penetration and makes harvesting easier by keeping the tree’s height manageable.

    It’s best to thin overcrowded branches during the dormant season, typically late winter, to minimize stress on the tree. Always dispose of pruned branches appropriately to prevent disease spread and keep your garden tidy.

    Shape Tree for Optimal Growth

    Shape Tree for Optimal Growth

    Shaping your fruit tree for optimal growth involves understanding the natural growth pattern and working with it rather than against it. Start by identifying the central leader or main trunk, which should remain dominant to encourage a strong, upright growth habit.

    To promote a balanced shape, prune the branches that compete with the central leader, allowing light and air to penetrate the canopy. Light and air circulation are essential for reducing disease risk and promoting even fruit ripening.

    When shaping your tree, aim for a structure that resembles an open vase with evenly spaced branches. This formation not only enhances sunlight exposure but also makes harvesting easier and more efficient.

    For trees in their early stages, focus on removing any suckers and water sprouts that divert energy from productive growth. As the tree matures, continue to shape it by pruning back any branches that cross or rub against each other, preventing potential damage and disease entry points.

    Regularly assess the growth of your tree to ensure that its shape facilitates healthy development and fruit production. Keep in mind that different fruit tree species may have specific preferences, so research your particular tree type for optimal shaping techniques.

    Incorporate these strategies into your regular pruning routine to maintain a healthy and productive fruit tree. With patience and practice, you will develop the skills to shape your trees effectively, ensuring bountiful harvests for years to come.

    Conclusion: Growing Success with These Plants

    In “How to Prune Fruit Trees,” we explored five key relationship concepts: clear communication, setting boundaries, nurturing growth, addressing conflicts, and maintaining balance. These principles are akin to pruning a tree; each cut is intentional, fostering a healthier, more fruitful relationship. Clear communication opens channels for honest dialogue, while setting boundaries ensures mutual respect. Nurturing growth encourages shared goals and dreams, while addressing conflicts prevents misunderstandings from taking root. Finally, maintaining balance between self-care and togetherness keeps the relationship thriving.

    As an immediate next step, consider having an open conversation with your partner about one area where you both can focus on nurturing growth. This can be a small step, like setting aside time each week for a shared hobby or discussing long-term aspirations.

    Remember, like a well-pruned tree, relationships require ongoing care and attention. Save or bookmark this article now to serve as your guide when you need a reminder of these essential practices. With dedication and mindful effort, relationship success is not just possible—it’s within your reach. Embrace these concepts, and watch your relationship flourish.

  • Best Trees for Urban Gardens

    Best Trees for Urban Gardens

    Imagine transforming your urban oasis into a lush, green sanctuary where the air feels fresher and the surroundings invite tranquility. Whether you’re just starting your gardening journey or are a seasoned cultivator of verdant spaces, choosing the right trees can revolutionize your small garden into a thriving retreat. In “Best Trees for Urban Gardens,” we explore a curated selection of trees that promise to enhance your space while fitting seamlessly into city living.

    This guide is packed with practical insights that cater to the unique challenges of urban gardening, from limited space to varying light conditions. Readers will discover trees that not only beautify their gardens but also offer shade, improve air quality, and provide a habitat for urban wildlife. With our expert advice, you’ll feel confident in selecting and nurturing trees that meet your garden’s needs, turning your concrete corner into a vibrant testament to the joys of successful gardening.

    Japanese Maple (Compact and Colorful Foliage)

    Japanese Maple (Compact and Colorful Foliage)

    Japanese Maples are an excellent choice for urban gardens due to their compact size and stunning foliage. These trees thrive in small spaces, making them perfect for patios, balconies, or small yards.

    To ensure healthy growth, plant your Japanese Maple in well-draining soil with a slightly acidic pH. It’s best to position them in a spot with morning sun and afternoon shade to protect their delicate leaves from scorching.

    Water these trees regularly, especially during dry spells, maintaining a consistent moisture level without waterlogging the roots. Mulching around the base can help retain moisture and provide extra nutrients as it breaks down.

    For more advanced care, consider annual pruning in late winter to maintain the desired shape and encourage new growth. Additionally, applying a balanced, slow-release fertilizer in early spring can enhance both foliage color and overall vitality.

    Columnar Apple Trees (Fruit-Bearing and Space-Saving)

    Columnar Apple Trees (Fruit-Bearing and Space-Saving)

    Columnar apple trees are a fantastic choice for urban gardens due to their slender, upright growth habit. These trees can thrive in small spaces, making them ideal for balconies or tight corners of a garden.

    To grow a healthy columnar apple tree, plant it in a location that receives at least six hours of sunlight daily. Use well-draining soil that is slightly acidic to neutral, aiming for a pH of 6.0 to 7.0.

    Regular watering is crucial, especially during the first few years, to establish a strong root system. Water deeply once a week, allowing the soil to dry slightly between sessions to prevent root rot.

    For optimal fruit production, consider planting more than one variety to ensure cross-pollination. Select varieties that are disease-resistant and suitable for your climate, and enjoy the rewards of fresh, homegrown apples right from your urban garden.

    Crepe Myrtle (Heat-Resistant and Low Maintenance)

    Crepe Myrtle (Heat-Resistant and Low Maintenance)

    Crepe Myrtle is an excellent choice for urban gardens due to its heat-resistant and low maintenance nature. This tree thrives in full sun, requiring at least six hours of direct sunlight daily to produce its vibrant blooms.

    When planting Crepe Myrtle, it’s important to choose well-draining soil to prevent root rot. A sandy loam is ideal, but these adaptable trees can tolerate a range of soil types if drainage is adequate.

    Watering needs are minimal once the tree is established; a deep watering every 7-10 days during dry spells is sufficient. To encourage strong growth and blooms, apply a balanced fertilizer in early spring as the tree begins to leaf out.

    For best results, prune your Crepe Myrtle in late winter to remove any dead or crossing branches, which helps maintain an open shape and promotes air circulation. Advanced gardeners can experiment with different pruning techniques to enhance the tree’s natural sculptural form.

    Dwarf Blue Spruce (Evergreen and Urban-Friendly)

    Dwarf Blue Spruce (Evergreen and Urban-Friendly)

    The Dwarf Blue Spruce is an excellent choice for urban gardens, offering both beauty and practicality. Its compact size and dense, blue-green foliage make it an ideal option for small spaces or as a focal point in larger gardens.

    When planting a Dwarf Blue Spruce, it’s crucial to select a location with full sun exposure. This tree thrives in well-draining soil, so consider mixing in sand or gravel if your garden has heavy clay or poor drainage.

    Regular watering is essential, especially during the first few years after planting when the tree is establishing its root system. However, be careful not to overwater as this evergreen prefers slightly drier conditions once established.

    For those looking to enhance their gardening skills, consider mulching around the base of the tree to retain moisture and suppress weeds. Pruning is rarely necessary, but if needed, it’s best done in late winter or early spring to maintain its shape and health.

    Espalier Fruit Trees (Vertical Growth for Tight Spaces)

    Espalier Fruit Trees (Vertical Growth for Tight Spaces)

    Espalier fruit trees offer a creative solution for urban gardeners with limited space. By training trees to grow flat against a wall or trellis, you can enjoy fresh fruit without needing a large yard.

    This technique involves careful pruning and support to achieve the desired shape. Start with young, flexible branches that can be easily manipulated into a horizontal or fan pattern.

    Choose fruit tree varieties that respond well to espalier, such as apples, pears, or figs. These trees not only adapt well to vertical growth but also produce abundant fruit when properly maintained.

    For optimal growth, plant your espalier tree in a location that receives full sun and has well-draining soil. Regular watering is essential, especially during the growing season, to ensure the roots stay moist but not waterlogged.

    Begin by installing a sturdy support structure, such as a wire frame or a wooden trellis, to guide and secure the branches as they grow. Prune the tree twice a year—once in late winter and again in summer—to maintain its shape and encourage fruit production.

    Advanced gardeners can experiment with different espalier designs, such as the candelabra or Belgian fence, to add an aesthetic touch to their garden. With patience and regular care, espalier trees can become a beautiful and productive feature in any urban garden.

    Conclusion: Growing Success with These Plants

    In exploring the vibrant possibilities for urban gardens, we uncovered five relationship concepts essential for nurturing greenery in tight spaces. First, we discussed the importance of compatibility between tree species and urban environments, ensuring that chosen trees thrive without overwhelming their surroundings. Next, we emphasized the necessity of communication, highlighting how understanding tree growth patterns can prevent conflicts with infrastructure. We also touched on adaptability, showcasing trees that flourish despite urban challenges. Preservation of harmony was another key point, where we explored how the right tree choices can enhance community spaces. Lastly, we celebrated the joy of shared growth, fostering connections through communal gardening efforts.

    To bring these concepts to life, why not start by visiting a local nursery or garden center to explore urban-friendly trees? This small step can lead to a flourishing green space that enhances your community and personal well-being.

    As you embark on this green journey, save this article for easy reference and inspiration. Bookmark it now to ensure that your urban gardening efforts are grounded in sound relationship principles. Remember, successful relationships, like thriving gardens, require patience, understanding, and a commitment to growth. Your urban oasis awaits—nurture it well!

  • Best Plants for Hanging Baskets

    Best Plants for Hanging Baskets

    Imagine transforming your living space into a cascading oasis of greenery with the help of hanging baskets, a simple yet stunning way to bring the garden indoors. Whether you’re a beginner dipping your toes into the world of gardening or a seasoned green thumb seeking fresh inspiration, our guide to the “Best Plants for Hanging Baskets” is your ticket to creating vibrant, living art that hangs gracefully from above.

    This thoughtfully curated list of plants offers something for everyone, capturing the beauty and ease of indoor gardening. You’ll discover plants that promise not only to beautify your home but also to thrive with minimal fuss, making them perfect companions for every gardener’s lifestyle. With these selections, you’ll gain practical insights into plant care and arrangement that will boost your confidence and ensure your efforts are met with success. Get ready to nurture your passion for gardening and enjoy the rewards of a lush, inviting home that reflects your love for all things green.

    Trailing Lobelia (Vibrant Blue Blooms)

    Trailing Lobelia (Vibrant Blue Blooms)

    Trailing Lobelia, known for its vibrant blue blooms, is an excellent choice for hanging baskets, adding a cascade of color to any garden space. These plants thrive in cooler temperatures and are perfect for spring and fall displays.

    To achieve the best growth, plant Lobelia in a well-draining potting mix rich in organic matter. Ensure your hanging basket is positioned in a spot that receives partial sunlight, as too much heat can stress the plant.

    Water Lobelia regularly to keep the soil moist, but be cautious not to overwater, as this can lead to root rot. A layer of mulch on top of the soil can help retain moisture, especially during warmer days.

    For continuous blooming, it’s essential to deadhead spent flowers regularly, which encourages new growth. Advanced gardeners might consider adding a balanced, water-soluble fertilizer every four to six weeks to boost the plant’s vigor and flowering potential.

    Sweet Alyssum (Fragrant Carpet of Flowers)

    Sweet Alyssum (Fragrant Carpet of Flowers)

    Sweet Alyssum is a delightful choice for hanging baskets, offering a fragrant carpet of flowers that can enhance any garden space. This plant thrives in full sun to partial shade, making it versatile for various locations around your home.

    Plant your Sweet Alyssum in well-draining soil, such as a mix of potting soil and sand, to ensure healthy growth. Water regularly but avoid overwatering; the soil should be moist but not soggy.

    For those living in warmer climates, consider positioning your hanging basket where it receives morning sun and afternoon shade to prevent wilting. Fertilize every four to six weeks with a balanced, water-soluble fertilizer to encourage continuous blooming.

    Beginner gardeners will appreciate Sweet Alyssum’s low maintenance, while more experienced gardeners can explore companion planting with herbs like thyme or basil. This plant is also attractive to pollinators, making it a great addition to any eco-friendly garden setup.

    Compact Fuchsia Varieties (Shade-Loving Elegance)

    Compact Fuchsia Varieties (Shade-Loving Elegance)

    Compact fuchsia varieties bring a touch of elegance to shaded areas, making them perfect for hanging baskets. These plants thrive best in indirect light, where they can enjoy the warmth without the harsh rays of the sun.

    To keep your fuchsias vibrant, ensure they are planted in well-draining soil rich in organic matter. A potting mix with added perlite or coarse sand will help maintain the necessary drainage and aeration for optimal growth.

    Watering is crucial for fuchsias, as they prefer consistently moist soil. However, avoid overwatering, which can lead to root rot; aim to water when the top inch of soil feels dry.

    For those looking to promote continuous blooms, regular feeding is essential. Use a water-soluble fertilizer every two weeks during the growing season to encourage lush foliage and abundant flowers.

    Pruning is another important aspect of fuchsia care, as it helps maintain their compact shape and encourages new growth. Trim back leggy stems in early spring, ensuring to cut just above a pair of leaves for the best results.

    Self-Watering Hanging Baskets (Consistent Moisture Control)

    Self-Watering Hanging Baskets (Consistent Moisture Control)

    Self-watering hanging baskets are an excellent choice for gardeners looking to maintain consistent moisture levels for their plants. These baskets are designed with a reservoir at the bottom, allowing plants to draw water as needed, which helps avoid both overwatering and underwatering.

    For optimal use, fill the reservoir completely and check it every few days to ensure it hasn’t run dry, especially during hot weather. It’s crucial to use a well-draining potting mix that retains moisture while allowing excess water to flow through, such as a blend containing peat moss and vermiculite.

    Plant selection is key when using self-watering baskets; opt for species that thrive in consistently moist soil. Plants like impatiens, begonias, or even trailing plants like sweet potato vines are excellent choices as they flourish in these conditions.

    To enhance the efficiency of your self-watering system, consider adding a layer of mulch on top of the soil to reduce evaporation. This simple step can significantly decrease the frequency of refilling the reservoir, making maintenance easier.

    Creeping Jenny (Golden Foliage for Contrast)

    Creeping Jenny (Golden Foliage for Contrast)

    Creeping Jenny, known for its vibrant golden foliage, is a fantastic choice for adding contrast to your hanging baskets. This hardy perennial thrives in USDA zones 3-9, making it a versatile option for many gardeners.

    To keep Creeping Jenny looking its best, ensure it receives full sun to partial shade. Although it can tolerate some drought, this plant prefers consistently moist soil, so regular watering is crucial.

    For optimal growth, use a well-draining potting mix enriched with organic matter. Consider adding perlite to improve drainage and avoid soggy conditions that may cause root rot.

    Incorporate Creeping Jenny into your hanging baskets to create a lush, trailing effect. Pair it with other plants that have contrasting foliage colors or textures, enhancing the visual appeal of your arrangement.

    Conclusion: Growing Success with These Plants

    In wrapping up our exploration of the best plants for hanging baskets, we discovered five key concepts that parallel nurturing healthy relationships: choosing the right environment, understanding compatibility, ensuring balanced care, fostering growth, and embracing diversity. Just as each plant thrives under specific conditions, so too do relationships flourish when we nurture them with understanding and attention.

    Now, take a moment to consider how you can apply these principles to your relationships. Perhaps it’s time to have an open conversation, plan a shared activity, or simply sit together and enjoy each other’s company. These small steps can cultivate profound growth and harmony.

    Before you go, remember to bookmark this article—it’s a handy guide to revisit when you need a gentle reminder of nurturing strategies. Relationships, like hanging baskets, require ongoing care and attention, but with the right approach, they can bloom beautifully.

    Looking ahead, envision a future where your relationships are thriving, vibrant, and deeply fulfilling. With the insights gained today, you are well-equipped to make that vision a reality. Here’s to cultivating connections that last a lifetime!

  • Succulent Gardening Tips

    Succulent Gardening Tips

    Welcome to the vibrant world of succulent gardening, where the joy of nurturing these resilient beauties knows no bounds! Whether you’re a budding gardener just starting to cultivate your green thumb or a seasoned plant enthusiast seeking to expand your collection, this guide is crafted to inspire and empower you. Succulents, with their diverse shapes, colors, and textures, offer endless possibilities for creativity and design in your home and garden.

    In this guide, you’ll discover a curated list of succulents that are not only visually stunning but also exceptionally easy to care for. These hardy plants are perfect for anyone looking to enjoy the benefits of gardening without the fuss, making them ideal companions for both novices and experienced gardeners alike. Dive into these practical tips and watch your confidence bloom as you learn the secrets to thriving succulents, ensuring your green space becomes a source of pride and serenity.

    Choose Pots with Drainage Holes

    Choose Pots with Drainage Holes

    When selecting pots for your succulents, ensure they have adequate drainage holes. This feature is crucial because succulents are prone to root rot if left in waterlogged soil.

    The presence of drainage holes allows excess water to escape, preventing the soil from remaining overly saturated. For beginners, it’s a simple yet effective step to safeguard your plants’ health.

    Consider using pots made from materials like terra cotta, which naturally wick moisture away from the soil. This adds an extra layer of protection against overwatering, a common mistake for succulent enthusiasts.

    For those looking to enhance their skills, try using a well-draining potting mix specifically designed for succulents, which usually contains a mix of sand, perlite, and gravel. This will work in harmony with pots that have drainage holes, ensuring your succulents thrive.

    Rotate Succulents for Even Growth

    Rotate Succulents for Even Growth

    To ensure your succulents grow evenly, it’s crucial to rotate them regularly. Succulents tend to grow towards the light, which can cause them to lean or stretch if left unchanged.

    Begin by placing your succulents in a spot where they receive bright, indirect sunlight. Every two weeks, give each pot a gentle quarter turn to encourage balanced growth.

    By rotating your succulents, you help all sides receive equal exposure to light. This practice not only promotes aesthetic symmetry but also strengthens the plant as a whole.

    Advanced gardeners might consider using a lazy Susan for easy rotation of multiple pots. Keeping a consistent rotation schedule can prevent the plants from becoming lopsided or leggy over time.

    Avoid Humidity and Over-Misting

    Avoid Humidity and Over-Misting

    While succulents are known for their drought tolerance, they thrive best in environments with low humidity. High humidity can cause moisture to linger on the leaves, increasing the risk of rot and disease. To ensure your succulents stay healthy, keep them in a well-ventilated area where air circulates freely.

    Avoid the common mistake of over-misting, which can lead to waterlogged roots and fungal issues. Instead, opt for a deep but infrequent watering routine that allows the soil to dry out completely between waterings. This approach mimics their natural desert habitat, promoting robust root development and overall plant health.

    For indoor succulents, consider using a dehumidifier if your home tends to be humid. This small adjustment can significantly improve the growing conditions, making your succulents more resilient and vibrant. Additionally, always use a pot with drainage holes and a well-draining soil mix, such as cactus or succulent soil, to prevent excess moisture accumulation.

    During particularly humid months, you might need to adjust your watering schedule, reducing the frequency to prevent overwatering. Advanced gardeners can monitor the humidity levels with a hygrometer, making precise adjustments to the care routine. By maintaining the ideal dry conditions, your succulents will flourish, showcasing their unique textures and forms beautifully.

    Fertilize During Active Growth

    Fertilize During Active Growth

    During their active growth phase, succulents benefit greatly from fertilization, which typically occurs in spring and summer. To ensure they thrive, use a balanced, water-soluble fertilizer diluted to half strength every four to six weeks.

    It’s important to choose a fertilizer with a low nitrogen content, as excessive nitrogen can lead to weak, overly lush growth. Look for products specifically formulated for cacti and succulents, as they provide the right nutrient balance.

    While fertilizing, make sure the soil is moist to prevent root burn, which can occur if the fertilizer is applied to dry soil. Water your succulents a few days before feeding them to ensure optimal absorption of nutrients.

    Advanced gardeners might consider using a slow-release fertilizer, which can be applied at the start of the growing season. This method ensures a steady supply of nutrients without the need for regular feeding, making it a convenient option for those with larger collections.

    Remove Dead Leaves Regularly

    Remove Dead Leaves Regularly

    Regularly removing dead leaves from your succulents is crucial for their health and appearance. This practice not only improves the aesthetic of your plant but also prevents disease and pest infestations.

    Dead leaves can harbor pests such as mealybugs or fungus gnats, which can quickly spread to healthy parts of the plant. By eliminating these leaves, you reduce the risk of infection and promote better air circulation around your succulents.

    To remove dead leaves, gently pull them away from the base of the plant, using your fingers or a pair of clean, sharp scissors. Be sure to dispose of the dead foliage away from your plant collection to prevent any potential spread of pests or diseases.

    In addition to removing dead leaves, inspect your succulents for any signs of overwatering, as this can also lead to leaf drop. Ensure you are using a well-draining soil mix, such as one made of coarse sand, perlite, and potting soil, to prevent excess moisture accumulation.

    Conclusion: Growing Success with These Plants

    In exploring the enchanting world of succulent gardening, we’ve uncovered five key relationship concepts that can beautifully translate into nurturing our personal connections. First, patience is vital; just as succulents require time to thrive, so do our relationships. Second, understanding each other’s needs is crucial, much like knowing the specific care requirements of different succulents. Third, creating a supportive environment encourages growth, reminding us to nurture our relationships with positivity and encouragement. Fourth, resilience builds strength; succulents teach us the power of enduring through challenges together. Lastly, celebrating uniqueness in every plant parallels appreciating individuality in our partners.

    As an actionable step, take a moment today to recognize and appreciate a unique quality in someone you care about, fostering a deeper connection. Remember, relationships, like gardens, flourish with attention and care. Bookmark this article as a trusted guide to revisit these principles whenever you need a gentle reminder.

    As you continue this journey, envision a future where your relationships are as vibrant and enduring as a well-tended succulent garden. Embrace the power of these insights and watch your connections thrive. Save this article now, and let it be your companion in cultivating lasting relationship success.

  • Best Plants for Privacy Screens

    Best Plants for Privacy Screens

    Gardening is a journey where every leaf unfurls a new possibility, and for those seeking a lush oasis within their home, the right plants can transform any room into a serene sanctuary. Whether you’re a novice just starting to explore the world of houseplants or a seasoned green thumb looking to expand your indoor jungle, finding the perfect plants for privacy screens can make your indoor space both beautiful and functional.

    Imagine creating a living tapestry of green that not only enhances your decor but also offers the practical benefit of privacy and noise reduction. This guide will introduce you to a curated list of indoor plants that excel as natural dividers, giving you the confidence to cultivate a peaceful retreat. With these carefully selected plants, you’ll discover the joy of watching your indoor garden flourish, knowing you’ve crafted a harmonious balance between aesthetics and practicality.

    Bamboo (Fast-Growing and Dense)

    Bamboo (Fast-Growing and Dense)

    Bamboo is an excellent choice for creating a natural privacy screen due to its fast growth and dense foliage. It can quickly transform your outdoor space into a secluded retreat, making it ideal for those seeking privacy.

    This versatile plant thrives in a variety of soil types, but it prefers well-drained, fertile soil to reach its full potential. To ensure healthy growth, water bamboo regularly, especially during dry periods, keeping the soil consistently moist but not waterlogged.

    For optimal growth, plant bamboo in a location that receives full to partial sunlight. If you’re in a colder climate, choose a hardy variety like Fargesia, which can withstand lower temperatures and provide a lush screen year-round.

    To maintain your bamboo’s health and manage its spread, consider installing a root barrier around the planting area. This will prevent the bamboo from becoming invasive, allowing it to flourish as a beautiful and controlled privacy screen in your garden.

    Thuja Green Giant (Evergreen and Low Maintenance)

    Thuja Green Giant (Evergreen and Low Maintenance)

    The Thuja Green Giant is an excellent choice for privacy screens due to its fast growth and dense foliage. This evergreen is highly adaptable, thriving in a range of climates and soil types, making it a versatile choice for many gardeners.

    For optimal growth, plant the Thuja Green Giant in well-draining soil with good exposure to sunlight. Water regularly during the first year to establish deep roots, then reduce frequency as the tree matures.

    To maintain healthy growth and a lush appearance, consider applying a balanced fertilizer in the early spring. Pruning is generally minimal, but trimming once a year can help maintain the desired shape and prevent overgrowth.

    Advanced gardeners might consider planting these trees in staggered rows to enhance thickness and visual interest. With proper care, the Thuja Green Giant can grow up to 3 feet per year, quickly providing an effective and attractive privacy solution.

    Holly Bushes (Year-Round Privacy and Berry Appeal)

    Holly Bushes (Year-Round Privacy and Berry Appeal)

    Holly bushes are a fantastic choice for creating year-round privacy screens with the added bonus of vibrant berries. These evergreen shrubs thrive in a range of climates, providing dense foliage that acts as a natural barrier.

    To ensure optimal growth, plant holly bushes in well-drained, slightly acidic soil with a pH of 5.0 to 6.0. It’s important to water them regularly, especially during dry spells, ensuring the soil remains moist but not waterlogged.

    For best results, position holly bushes in a spot where they receive full sun to partial shade. This sunlight exposure encourages healthy leaf development and enhances berry production, which is a delightful feature during the winter months.

    Pruning holly bushes is essential to maintain their shape and promote bushier growth. Prune in late winter or early spring before new growth starts, and consider using the trimmings for decorative purposes or mulching.

    Privet Hedge (Versatile and Easily Shaped)

    Privet Hedge (Versatile and Easily Shaped)

    Privet hedge is a popular choice for privacy screens due to its versatility and ease of shaping. Its dense foliage provides an excellent barrier, making it ideal for creating a secluded outdoor space.

    To ensure optimal growth, plant privet hedges in well-draining soil enriched with organic compost. Water them regularly, especially during dry spells, to maintain lush foliage and healthy growth.

    Pruning is a key aspect of maintaining a neat and attractive privet hedge. Trim the hedge at least twice a year; late spring and late summer are ideal times to encourage a dense, bushy appearance.

    For those seeking a more advanced touch, consider shaping your privet hedge into unique forms. With regular trimming, you can experiment with different shapes, adding an artistic flair to your garden while maintaining privacy.

    Clumping Bamboo (Non-Invasive and Elegant)

    Clumping Bamboo (Non-Invasive and Elegant)

    Clumping bamboo is an excellent choice for a privacy screen due to its non-invasive nature and elegant appearance. Unlike running bamboo, clumping varieties grow in a tight formation, making them manageable and perfect for confined spaces.

    To successfully grow clumping bamboo, plant it in a location that receives full sun to partial shade. It thrives in well-draining, loamy soil enriched with organic matter, which helps retain moisture and provides essential nutrients.

    Regular watering is crucial, especially during the first couple of years as the bamboo establishes itself. However, once established, clumping bamboo is relatively drought-tolerant, making it a low-maintenance option for busy gardeners.

    For those seeking a lush, dense screen, consider varieties like Fargesia and Bambusa, which are known for their compact growth habits and cold hardiness. Pruning once a year in late winter or early spring helps maintain the desired height and encourages new growth, enhancing the plant’s fullness.

    Conclusion: Growing Success with These Plants

    In exploring the ‘Best Plants for Privacy Screens,’ we uncovered five key relationship concepts: the importance of creating personal space, fostering a nurturing environment, understanding the significance of natural barriers, cultivating growth and patience, and enhancing communication through shared projects. Each of these principles can transform not only your garden but also the landscape of your personal relationships.

    As an actionable next step, consider choosing one plant from the article that resonates with you and involves your partner or family in planting it. This shared activity can serve as a metaphor for the relationship growth you seek, providing a tangible reminder of your commitment to nurturing your bonds.

    Don’t forget to save or bookmark this article for future reference. It’s packed with tips that can be revisited whenever you’re looking to enhance your living space and relationships simultaneously.

    Looking ahead, remember that successful relationships, like gardens, require ongoing care and attention. By integrating these concepts into your life, you empower yourself to cultivate deeper connections and a more harmonious home environment. Embrace this opportunity to grow together and transform your space into a sanctuary of love and privacy.