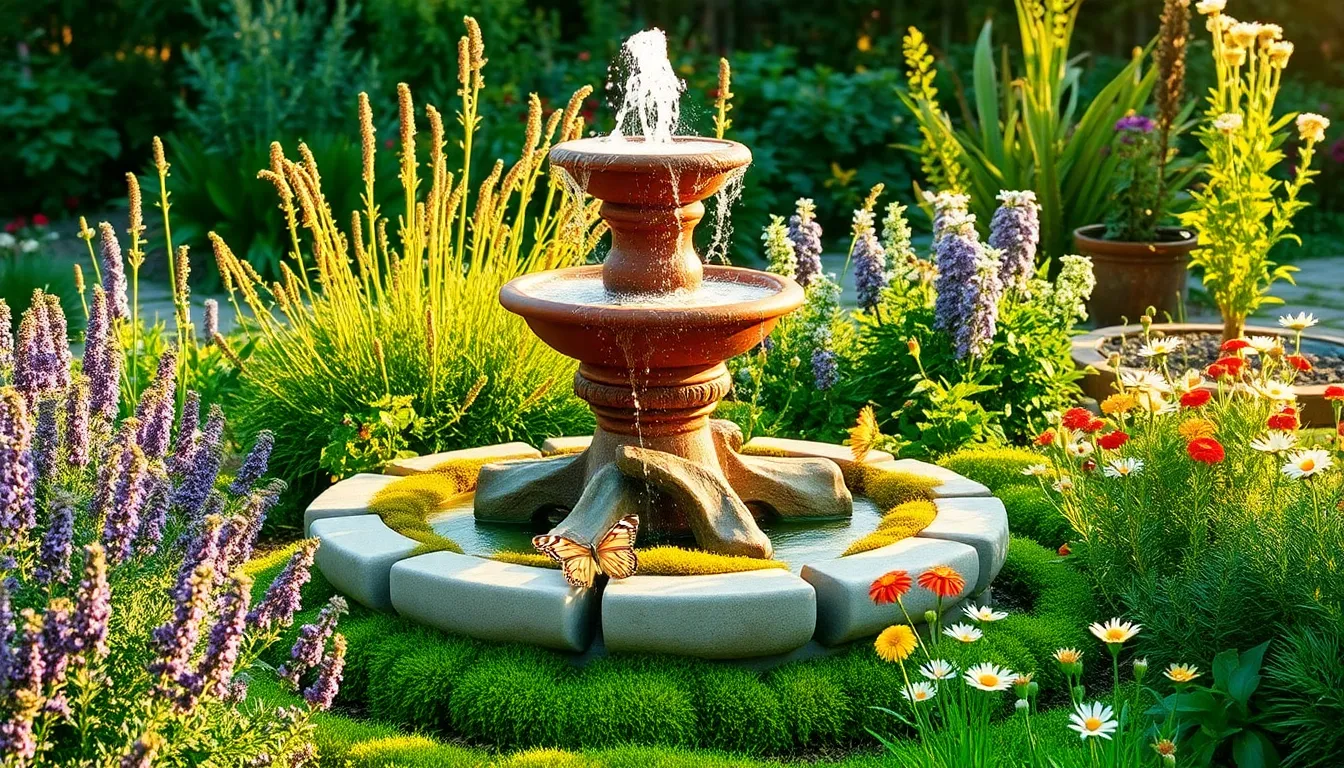
Category: Beginner Gardening Tips

  • Low-Light Gardening Tips

    Low-Light Gardening Tips

    Welcome to “Low-Light Gardening Tips,” where the magic of gardening unfolds even in the shadows! Whether you’re a budding enthusiast or a seasoned green thumb, this guide invites you to explore and delight in the hidden potential of low-light spaces. Cultivating a thriving garden doesn’t always require abundant sunlight, and here, you’ll discover how a touch of creativity and the right plant choices can transform dim corners into lush, verdant havens.

    In this guide, you’ll find a treasure trove of practical tips and insights tailored to help you succeed, regardless of your experience level. From understanding the unique needs of shade-loving plants to designing spaces that maximize beauty and functionality, we’ve got you covered. With each page, you’ll gain the confidence to create a garden that not only survives but flourishes, bringing joy and tranquility to your daily life. Embrace the challenge, and let the adventure of low-light gardening inspire you to cultivate your own oasis of greenery and calm.

    Choose Shade-Tolerant Plant Varieties

    Choose Shade-Tolerant Plant Varieties

    When gardening in low-light environments, it’s crucial to select plants that thrive in shade. Some excellent options for shade-tolerant plants include ferns, hostas, and Astilbe, which are known for their ability to flourish with minimal sunlight.

    For a successful shade garden, consider the soil quality—ensure it’s well-draining yet retains moisture. Adding organic matter like compost can enhance soil structure and provide the nutrients shade plants need to thrive.

    Watering is another key factor; shade-tolerant plants generally need less frequent watering than their sun-loving counterparts. However, it’s important to maintain consistent soil moisture, especially during dry spells, to prevent stress and encourage healthy growth.

    Advanced gardeners might experiment with layering different plant heights to create depth and interest in a shade garden. By placing taller plants like hydrangeas at the back and shorter ones like creeping Jenny at the front, you can create a lush, visually appealing landscape.

    Use Reflective Surfaces Strategically

    Use Reflective Surfaces Strategically

    To make the most of low-light areas, consider using reflective surfaces to amplify available light. Strategically placing mirrors or reflective materials can significantly enhance the brightness around your plants, allowing them to thrive even in dim conditions.

    Position mirrors directly opposite windows or light sources to bounce natural light deeper into the room. Ensure mirrors are placed at an angle that redirects the light effectively across your plants, avoiding any harsh, direct glare that might harm delicate foliage.

    Aluminum foil or white-painted surfaces can also serve as inexpensive and effective reflectors for improving light distribution. Place these reflective materials on walls, under shelves, or behind plants to maximize the amount of light they receive.

    For outdoor gardens with dense foliage, try using water features like small ponds or birdbaths to reflect sunlight onto shaded areas. These not only increase light but also add aesthetic value and attract beneficial wildlife to your garden, enhancing its ecosystem.

    Rotate Plants for Even Growth

    Rotate Plants for Even Growth

    To ensure even growth in low-light conditions, it’s important to rotate your plants regularly. By turning your plants a quarter turn every week, you help each side receive equal exposure to available light, preventing one side from becoming spindly or pale.

    Consider marking your pots with a small dot to remind you where the last rotation started. This simple trick can significantly enhance plant symmetry and overall health, especially for larger leafy plants like the Peace Lily or Rubber Plant.

    For beginners, setting a reminder on your phone every seven days can help maintain a consistent rotation schedule. Advanced gardeners might experiment with rotating plants more frequently if they notice uneven light distribution in their specific environment.

    Keep an eye on the direction of your light source and adjust as needed, particularly during seasonal changes. Understanding how light moves through your space can assist in determining the best rotation frequency, ensuring that your plants thrive even in challenging low-light conditions.

    Utilize Grow Lights for Boost

    Utilize Grow Lights for Boost

    One way to enhance your low-light gardening efforts is by incorporating grow lights. These lights are especially useful during the winter months when natural sunlight is limited.

    Choose LED grow lights for their energy efficiency and low heat output, making them safe for your plants. They can be set up easily in tight spaces like apartments or small indoor gardens.

    Position your grow lights about 6 to 12 inches above the plants to mimic natural sunlight. Adjust the height as your plants grow, ensuring they receive optimal light exposure without overheating.

    Consider using a timer to automate the lighting schedule, providing your plants with 12 to 16 hours of light daily. This consistency can significantly boost growth, helping plants to thrive even in low-light conditions.

    For those looking to delve deeper, experiment with different light spectrums to enhance specific phases of plant growth. Blue light encourages vegetative growth, while red light supports flowering and fruiting.

    Incorporate Light-Colored Planters

    Incorporate Light-Colored Planters

    To make the most of low-light areas in your garden, consider using light-colored planters. Light-colored surfaces reflect more light, which can help distribute available light more evenly to your plants. This is especially beneficial in indoor spaces or shaded outdoor areas where natural light is limited.

    Choosing the right material for these planters is equally important. Opt for materials such as ceramic or light-colored plastic, as they not only reflect light but also retain moisture well. This feature is crucial in low-light conditions where evaporation is generally slower, helping to maintain a consistent moisture level for your plants.

    For beginners, starting with small to medium-sized planters is a practical choice. These sizes offer enough room for the roots to grow without overwhelming the limited light resources. Advanced gardeners can experiment with positioning their planters strategically to maximize light reflection, like placing them near mirrors or light-colored walls.

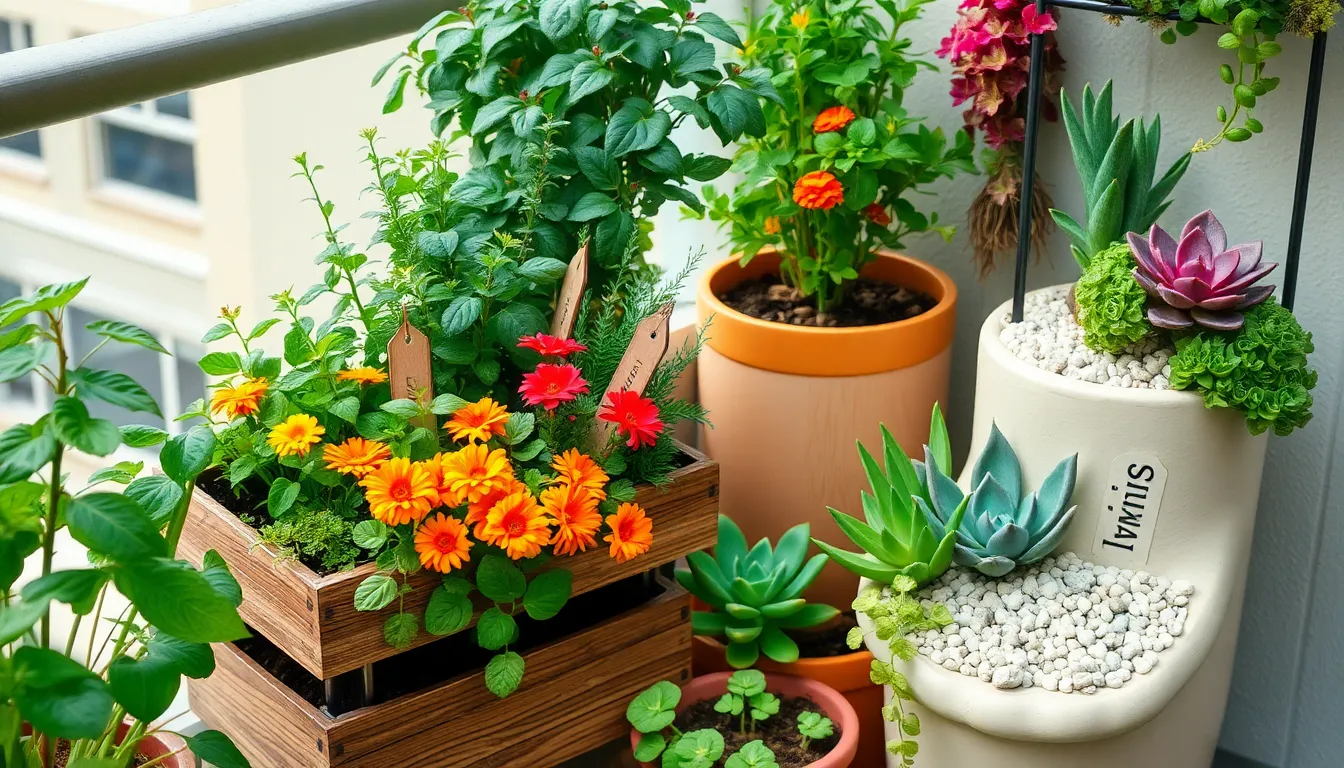
    Consider using self-watering planters in your setup to maintain optimal soil moisture. These planters have a reservoir that allows plants to draw water as needed, ensuring they don’t dry out in the less intense light. This setup is particularly beneficial for moisture-loving plants such as ferns and peace lilies, which thrive in low-light environments.

    Conclusion: Growing Success with These Plants

    In exploring the enriching world of low-light gardening, we discovered five key relationship concepts that resonate beyond the garden. First, patience is vital, just as nurturing plants in dim conditions takes time. Second, adaptability allows us to adjust our care techniques to suit our partners’ unique needs. Third, communication is as essential as knowing when your plant needs water. Fourth, consistency in care fosters trust and growth, both for plants and relationships. Finally, resilience keeps us thriving amidst challenges, just like our greenery perseveres in less-than-ideal conditions.

    As an immediate step, try to identify one area in your relationship that could benefit from these insights. Whether it’s enhancing communication or practicing patience, taking action today can sow the seeds for tomorrow’s growth.

    Bookmark this article as a go-to resource for nurturing your relationships, just as you would tend to a beloved garden. Together, let’s cultivate relationships that flourish, no matter the light available. Remember, with every small action you take, you’re paving the way for a brighter, more harmonious future. Save this guide and revisit it whenever you need a reminder of how to nurture your connections with care and intention.

  • How to Create a Garden Oasis

    How to Create a Garden Oasis

    Imagine stepping into your backyard and being transported to a serene haven, where the stresses of daily life melt away amidst the gentle rustle of leaves and the vibrant chorus of colors. Crafting a garden oasis isn’t just about aesthetics; it’s about creating a sanctuary that nourishes both the spirit and the senses, providing a peaceful retreat right outside your door. Whether you’re planting your first seedling or have years of gardening wisdom under your belt, designing this verdant escape can be a transformative experience that enriches your connection to nature.

    Creating a personal paradise is more than just planting flowers—it’s about orchestrating a symphony of textures, scents, and sounds that reflects your personal style. In this guide, you’ll discover how to select plants that thrive in harmony, design spaces that invite relaxation, and incorporate elements that soothe and inspire. From choosing the right foliage to creating cozy nooks, you’ll learn practical strategies to transform any space into a lush, inviting retreat. Get ready to dig in and cultivate a little slice of paradise that feels uniquely yours.

    Select a Tranquil Location

    Select a Tranquil Location

    Finding a tranquil location for your garden is essential to creating a peaceful oasis. Choose a spot that receives the right amount of sunlight, typically six to eight hours for most flowering plants, ensuring both beauty and growth.

    Consider the surrounding environment to minimize noise and distractions. Tall hedges or fences can help block out unwanted sounds, providing a more serene atmosphere.

    Evaluate the soil condition in your chosen area, as it forms the foundation of a thriving garden. Amending the soil with organic matter like compost can enhance drainage and nutrient content, supporting healthy plant growth.

    For those with more experience, think about incorporating features that enhance tranquility, such as a small water fountain or wind chimes. These elements can add soothing sounds and visual interest, deepening the sense of peace in your garden.

    Design a Calming Layout

    Design a Calming Layout

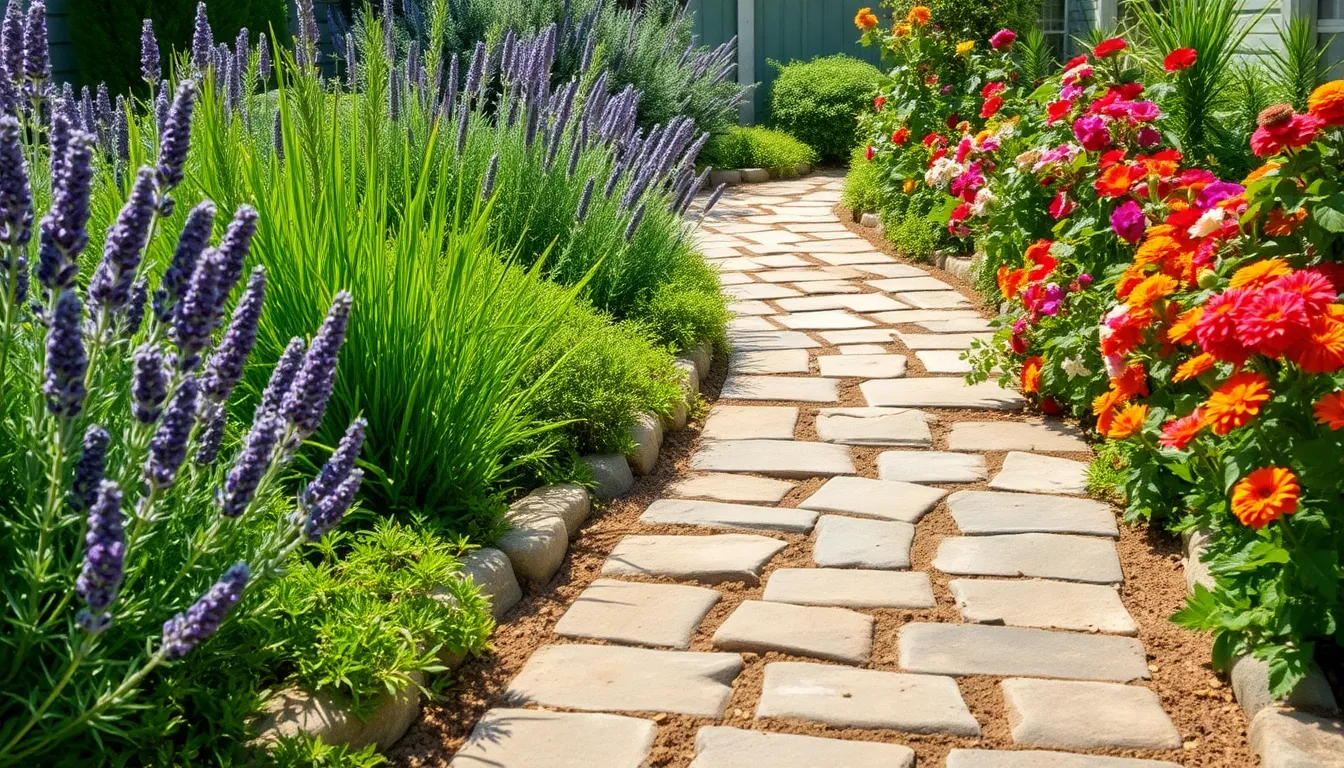
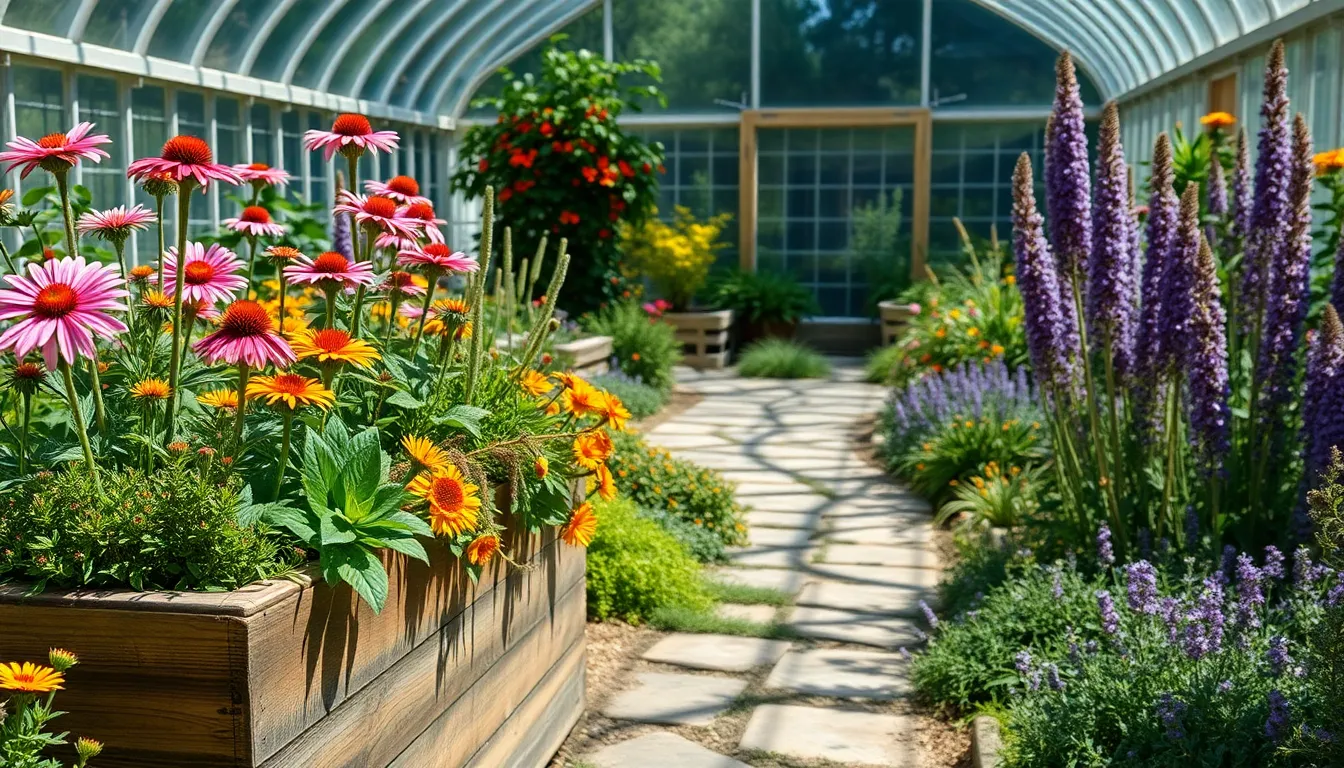
    Creating a calming garden layout begins with understanding the flow of your space. Use pathways to gently guide visitors, incorporating curves rather than straight lines to encourage a slower, more contemplative stroll.

    Consider using materials like gravel or stepping stones for pathways, as their textures and colors can add a natural, soothing element. Gravel paths also provide a pleasant crunch underfoot, enhancing the sensory experience of your garden.

    Integrate areas for relaxation with comfortable seating that blends into the environment. Choose natural materials like wood or stone, and position seating to offer views of your favorite plants or water features.

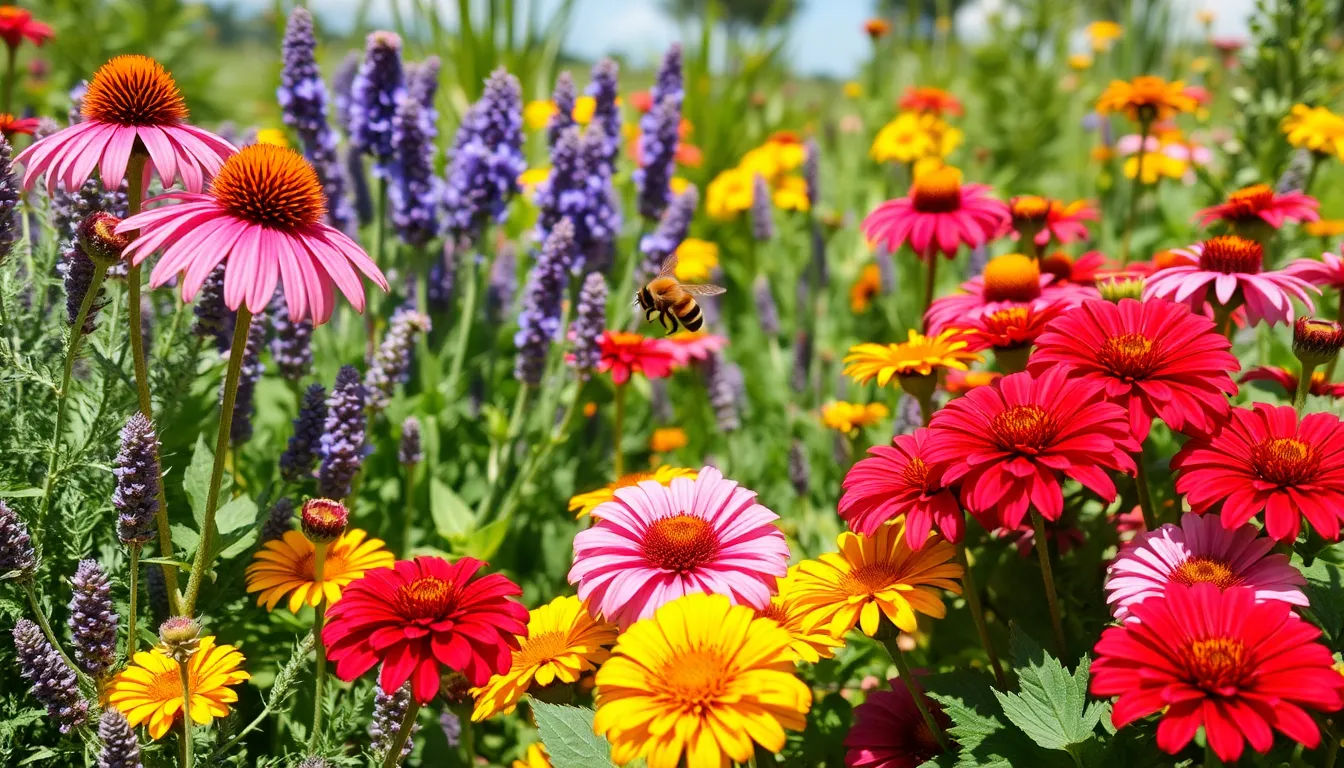
    Plant selection is crucial to setting the mood, so opt for species known for their calming effects, like lavender or chamomile. These plants not only emit soothing fragrances but also attract beneficial insects like bees and butterflies, enhancing the peaceful ambiance.

    For a more advanced touch, consider adding vertical elements such as a trellis with climbing plants. Clematis or wisteria can provide shade and a beautiful focal point, while also creating a sense of enclosure and privacy.

    Finally, ensure you choose plants suited to your climate and soil type, as healthy plants contribute greatly to the garden’s tranquility. Regularly check soil moisture and adjust watering routines to maintain optimal growing conditions, particularly for sensitive species.

    Incorporate Soothing Water Features

    Incorporate Soothing Water Features

    Incorporating a soothing water feature can significantly enhance the tranquility of your garden oasis. Consider installing a small fountain or a pond to introduce the calming sound of water, which can help mask neighborhood noise and create a peaceful retreat.

    When planning a water feature, choose a location that receives partial sunlight to prevent algae growth. For beginners, solar-powered fountains are an excellent choice as they are eco-friendly and easy to maintain, requiring minimal setup and zero electricity costs.

    Ensure your water feature is on level ground and lined with a durable material like rubber or PVC to prevent leaks. Advanced gardeners might explore adding aquatic plants such as water lilies or lotus, which thrive in ponds and require at least six hours of sunlight daily.

    Regular maintenance is crucial to keep your water feature clean and functional. Remove debris and algae buildup weekly, and ensure the water level is consistent, especially during hot weather when evaporation is high.

    Plant Lush, Relaxing Greenery

    Plant Lush, Relaxing Greenery

    Creating a lush, relaxing garden begins with selecting the right plants that thrive in your specific climate. Consider incorporating a mix of evergreens and deciduous shrubs to ensure year-round interest and texture in your garden.

    Choose plants with varying shades of green to add depth and calmness to your oasis. For example, ferns, such as the Boston fern, are perfect for shaded areas and offer soft, feathery foliage that creates a serene atmosphere.

    Soil preparation is crucial for lush plant growth, so start by testing your soil’s pH and nutrient levels. Amend the soil with organic matter like compost to improve drainage and provide essential nutrients for your plants.

    Watering is key to maintaining vibrant greenery, but it’s important to avoid overwatering. Most greenery benefits from a deep watering once or twice a week, allowing the soil to dry out slightly between waterings to prevent root rot.

    For more advanced gardeners, consider integrating companion planting to enhance plant growth and health. Pairing plants such as hostas and astilbes can help control pests naturally while adding layers of lush texture to your garden.

    Add Cozy, Inviting Seating

    Add Cozy, Inviting Seating

    Creating a welcoming garden oasis isn’t complete without adding cozy, inviting seating. Begin by determining the best location for your seating area, considering factors like sunlight, shade, and proximity to fragrant plants to enhance relaxation.

    Opt for weather-resistant furniture materials such as teak, wrought iron, or powder-coated aluminum to ensure longevity. Adding cushions made from outdoor fabric will not only enhance comfort but also bring a pop of color and style to your garden setup.

    Consider incorporating seating options that blend seamlessly with the natural surroundings. For a rustic look, use wooden benches or stone seats nestled among your plants, while a swing or hammock can add a playful touch to your retreat.

    Enhance the ambiance by surrounding your seating area with potted plants or climbing vines. Choose easy-care varieties like lavender or jasmine which not only thrive in containers but also release a pleasant aroma, adding to the cozy atmosphere.

    Conclusion: Growing Success with These Plants

    Creating a garden oasis isn’t just about cultivating plants; it’s about nurturing the key elements of a thriving relationship. First, communication is like sunlight, essential for growth. Second, mutual respect acts as rich soil, providing a foundation for roots to deepen. Third, shared goals are akin to seeds, blossoming into shared dreams over time. Fourth, adaptability is water, ensuring your relationship remains resilient through changing conditions. Lastly, quality time is the gentle pruning that keeps your relationship vibrant and healthy.

    To take immediate action, why not schedule a garden date with your partner this week? Use this time to discuss dreams and goals, ensuring you’re both aligned and growing together.

    Remember to save or bookmark this article as a handy reference whenever you need to refresh your relationship gardening skills. By doing so, you’re investing in a bountiful future of love and understanding.

    As you continue nurturing these elements, your relationship is bound to flourish, leading to a lifetime of shared joy and resilience. Embrace this journey with optimism and watch your love blossom into a beautiful oasis.

  • How to Plant Garlic in Winter

    How to Plant Garlic in Winter

    As the days grow shorter and the air turns crisp, many might think it’s time to pack away the gardening gloves until spring. However, winter offers a unique opportunity to plant garlic, a robust and rewarding crop that thrives in the cold. For both novice gardeners and seasoned green thumbs, planting garlic in winter is a delightful way to keep your hands in the soil and your spirit connected to the garden year-round. This ancient practice not only enriches your culinary endeavors but also enhances your garden’s ecosystem with its natural pest-repellent properties.

    Winter planting might sound daunting at first, but it’s a straightforward and gratifying process with the right guidance. In this article, you’ll learn how to select the best garlic varieties, prepare your soil for optimal growth, and care for your plants through the chilly months. Whether you’re aiming for a bountiful harvest to spice up your kitchen or seeking to expand your gardening know-how, planting garlic in winter is a fantastic endeavor. Together, we’ll explore each step with practical tips and insights to ensure your garlic garden thrives.

    The beauty of winter garlic planting lies in its simplicity and the promise of future rewards. You’ll discover how to harness the season’s natural rhythms to cultivate a crop that’s as nourishing as it is flavorful. By the end of this guide, you’ll be well-equipped to nurture your winter garlic with confidence, transforming your dormant garden into a space teeming with life and potential. So, grab your trowel, and let’s embark on this winter gardening adventure together.

    Select Cold-Hardy Garlic Varieties

    Select Cold-Hardy Garlic Varieties

    When selecting garlic varieties for winter planting, choosing cold-hardy types is essential to ensure successful growth. Hardneck varieties like ‘Rocambole’ and ‘Porcelain’ are well-suited for colder climates, as they naturally develop in regions with harsh winters.

    These hardneck varieties require a period of cold dormancy, known as vernalization, to produce robust bulbs. Plant them in well-drained soil with a pH between 6.0 and 7.0 to provide optimal growing conditions.

    For gardeners in areas with severe winters, mulching is a critical step to protect garlic bulbs from freezing temperatures. Apply a thick layer of organic mulch, such as straw or shredded leaves, to insulate the soil and retain moisture.

    Hardneck garlic not only tolerates cold climates but also offers the added benefit of producing garlic scapes in early summer. These scapes are edible and can be harvested to encourage the plant to focus its energy on bulb development rather than flowering.

    Prepare Well-Drained Garden Beds

    Prepare Well-Drained Garden Beds

    To ensure your garlic thrives over the winter, it’s essential to prepare well-drained garden beds. Begin by selecting a location that receives full sunlight, as garlic requires at least six to eight hours of sun daily for optimal growth.

    Start by loosening the soil to a depth of at least 12 inches using a garden fork or tiller. This depth encourages root development and prevents water from pooling around the garlic bulbs, which can cause rot.

    Amend the soil with plenty of organic matter like compost or well-aged manure, which will enhance drainage and add essential nutrients. Aim for a soil pH of 6.0 to 7.0; a soil test kit can help you determine if adjustments are necessary.

    For gardeners in regions with heavy clay soil, consider building raised beds to improve drainage and soil structure. Alternatively, mix in coarse sand or perlite to increase porosity and reduce compaction.

    • Ensure the beds are slightly raised above ground level to prevent waterlogging.
    • Space rows of garlic about 12 inches apart to allow good air circulation.
    • After planting, cover the bed with a layer of mulch to retain moisture and protect against frost.

    Regularly check soil moisture levels; garlic prefers evenly moist soil but not soggy conditions. Water the beds deeply but infrequently, allowing the top inch of soil to dry out between watering sessions.

    Plant Cloves Four Inches Apart

    Plant Cloves Four Inches Apart

    When planting garlic cloves, spacing is crucial to ensure they have enough room to grow. Plant each clove four inches apart in rows that are spaced about six to eight inches apart. This spacing not only allows for optimal bulb development but also ensures adequate air circulation, which helps prevent diseases.

    Before planting, make sure to select healthy, large cloves, as these will produce the best bulbs. Avoid planting cloves that are damaged or have mold, as this can impact growth and yield. Plant the cloves with the pointed end facing upwards and push them about two inches deep into the soil. This orientation helps the garlic sprout correctly and grow into a robust plant.

    Garlic thrives in loose, well-draining soil with a pH of 6.0 to 7.0. If your soil is heavy clay, consider amending it with compost or aged manure to improve drainage. Water the garlic bed thoroughly after planting to help settle the soil around the cloves, but be careful not to overwater, as garlic does not like to sit in soggy soil.

    For those in colder climates, adding a thick layer of mulch, such as straw or shredded leaves, can help protect the garlic during freezing temperatures. This mulch acts as an insulator, keeping the soil temperature more consistent and preventing frost heave. Remove the mulch in early spring once the danger of severe frost has passed to allow the soil to warm up, promoting early growth.

    Mulch Heavily to Insulate Soil

    Mulch Heavily to Insulate Soil

    After planting the cloves, it’s essential to mulch heavily to insulate the soil during the cold winter months. This layer of protection helps maintain a consistent soil temperature, which is crucial for garlic cloves to establish strong roots before the ground freezes.

    Use organic materials like straw, shredded leaves, or wood chips for mulching, spreading them about four to six inches thick over the planted area. This not only insulates the soil but also suppresses weeds and retains moisture, reducing the need for frequent watering.

    It’s important to avoid using hay, as it often contains weed seeds that could compete with your garlic for nutrients. For more experienced gardeners, consider using a layer of compost beneath the mulch to provide additional nutrients as it breaks down, further benefiting your garlic plants.

    In regions with particularly harsh winters, you can add an extra layer of mulch in late fall for added insulation. As spring approaches, gradually remove some of the mulch to allow the soil to warm and the garlic shoots to emerge more easily.

    Water Sparingly During Dormancy

    Water Sparingly During Dormancy

    During the winter, garlic plants enter a period of dormancy, requiring less water than when actively growing. Overwatering during this time can lead to root rot, so it’s crucial to adjust your watering schedule accordingly.

    Check the soil moisture by inserting your finger a couple of inches deep into the soil. If the soil feels dry at this depth, a light watering is needed, but if it’s still moist, hold off on watering to avoid waterlogging.

    In regions with regular winter precipitation, you might not need to water at all, as natural rainfall can suffice. However, in drier climates, consider watering sparingly, perhaps once every three to four weeks, ensuring the soil doesn’t dry out completely.

    For those with raised beds or well-draining soil, monitor the moisture levels more closely, as these setups can dry out faster. Adding a layer of mulch, as discussed previously, not only insulates soil but also helps retain moisture, reducing the need for frequent watering.

    Conclusion: Growing Success with These Plants

    In nurturing relationships, much like planting garlic in winter, timing, preparation, patience, communication, and trust are essential. First, understanding the right moment to plant the seeds of connection ensures that relationships grow strong and resilient. Preparation involves laying a solid foundation through open conversations and shared goals. Patience allows relationships to flourish naturally, understanding that growth takes time. Effective communication keeps the relationship thriving, much like nourishing soil, while trust acts as the protective layer against the harsh elements.

    Now, take a moment to reflect on these concepts and identify one small action you can take today to strengthen your relationship, whether it’s a heartfelt conversation or planning a future activity together.

    Bookmark this article as your go-to guide for nurturing your relationships through any season. Just like a well-tended garden, your relationship can thrive with attention and care.

    Remember, the seeds you plant today will blossom into the love and partnership you desire tomorrow. Your journey toward relationship success starts now, and with every step, you’re building a future filled with warmth and understanding.

  • Gardening with Succulents in Containers

    Gardening with Succulents in Containers

    Stepping into the world of gardening with succulents in containers is like unlocking a treasure chest of vibrant possibilities. Whether you’re a seasoned gardener or just beginning to flex your green thumb, succulents offer a delightful and low-maintenance way to bring nature’s beauty into your home or garden. These hardy plants are not only captivating with their diverse shapes and colors but also incredibly forgiving, making them perfect companions for busy lifestyles or those new to plant care.

    The beauty of container gardening with succulents lies in its versatility and simplicity. You can create stunning arrangements that thrive in small spaces, adding a touch of greenery to your windowsill, patio, or desk. In this article, we’ll explore how to choose the right containers and soil mix to ensure your succulents flourish. We’ll also delve into the essential care tips that make these resilient plants a joy to nurture, from light requirements to watering techniques that mimic their natural habitat.

    By the end of this guide, you’ll feel confident in crafting your own succulent container garden that reflects your unique style and space. We’ll guide you through the process of selecting complementary plant varieties and arranging them for maximum visual impact. As you embark on this journey, you’ll discover the rewarding experience of cultivating a living art piece that evolves and grows over time. Whether you’re looking to add a touch of green to your urban apartment or enhance your garden with drought-resistant beauties, gardening with succulents in containers offers endless opportunities for creativity and satisfaction.

    Choosing Ideal Succulent Varieties

    Choosing Ideal Succulent Varieties

    When selecting succulents for container gardening, consider their light requirements and growth habits. Popular choices such as Echeveria and Sedum thrive in bright, direct sunlight, making them ideal for sunny windowsills or patios.

    It’s essential to choose the right soil mix to ensure the success of your succulent varieties. A well-draining mix, containing ingredients like perlite or coarse sand, helps prevent root rot by allowing excess water to escape.

    Watering succulents requires a careful balance to avoid overwatering, which is a common mistake among beginners. Allow the soil to dry completely between waterings, typically once every two weeks, depending on your climate and container size.

    For gardeners looking to experiment, consider trying less common varieties like Haworthia or Lithops. These succulents not only add unique textures and shapes to your collection but also require similar care, making them excellent companions to traditional options.

    Selecting the Perfect Containers

    Selecting the Perfect Containers

    When selecting containers for your succulents, consider the material and drainage capabilities. Terracotta pots are excellent choices as they allow for good air circulation and help prevent overwatering by absorbing excess moisture.

    Alternatively, ceramic and plastic pots can also work well if they have drainage holes. Ensuring proper drainage is crucial to prevent root rot, a common issue with succulents in non-draining containers.

    For those new to succulent gardening, start with small containers that are just slightly larger than the plant itself. This helps control moisture levels and prevents overwatering, a frequent mistake among beginners.

    Experienced gardeners might experiment with creative container arrangements, such as hanging pots or wall-mounted planters. These options not only save space but can also create stunning visual displays while still providing necessary drainage.

    Certain succulents, like those with shallow roots, thrive in wide, shallow dishes. This design mirrors their natural habitat, offering ample space for spreading roots without retaining excess moisture.

    Regardless of the container chosen, always use a well-draining soil mix specifically designed for succulents. This is key to preventing waterlogging and ensuring the long-term health of your plants.

    Preparing Potting Mix for Success

    Preparing Potting Mix for Success

    To begin with, creating the right potting mix is crucial for the success of your succulent container garden. Succulents require a well-draining soil to thrive, preventing root rot which can occur in overly moist environments.

    Consider using a commercial cactus mix as a base, which is specifically formulated for succulents and cacti. Alternatively, you can create your own by mixing two parts potting soil with one part coarse sand and one part perlite or pumice, ensuring excellent drainage.

    It’s important to ensure the mix is light and airy, which facilitates healthy root growth and water movement. Additionally, adding a handful of small gravel or crushed granite can enhance drainage and mimic the succulents’ natural habitat.

    For those looking to elevate their succulent care, consider incorporating a slow-release fertilizer into the mix. This provides a steady supply of nutrients without overwhelming the plants, as succulents generally require less feeding than other container plants.

    Mastering Watering and Drainage

    Mastering Watering and Drainage

    Watering and drainage are crucial elements for the health of succulents in containers. To thrive, succulents need a balance of moisture and dryness, as they store water in their leaves, stems, and roots.

    When watering your succulents, aim to thoroughly soak the soil and then allow it to dry out completely before the next watering. This approach mimics the succulents’ natural environment and helps prevent root rot, a common issue caused by overwatering.

    Ensure your containers have adequate drainage holes to allow excess water to escape. Without proper drainage, water can accumulate at the bottom, leading to soggy soil and unhealthy plants.

    For those looking to refine their watering technique, consider using a moisture meter to precisely gauge when the soil is dry enough for the next watering. This tool is especially helpful for beginners who may not yet recognize the subtle signs of a succulent’s water needs.

    Advanced gardeners might explore the use of wick irrigation systems for larger succulent arrangements or indoor displays. These systems can help maintain consistent moisture levels without the risk of overwatering, offering a high degree of control and convenience.

    Arranging and Displaying Your Succulents

    Arranging and Displaying Your Succulents

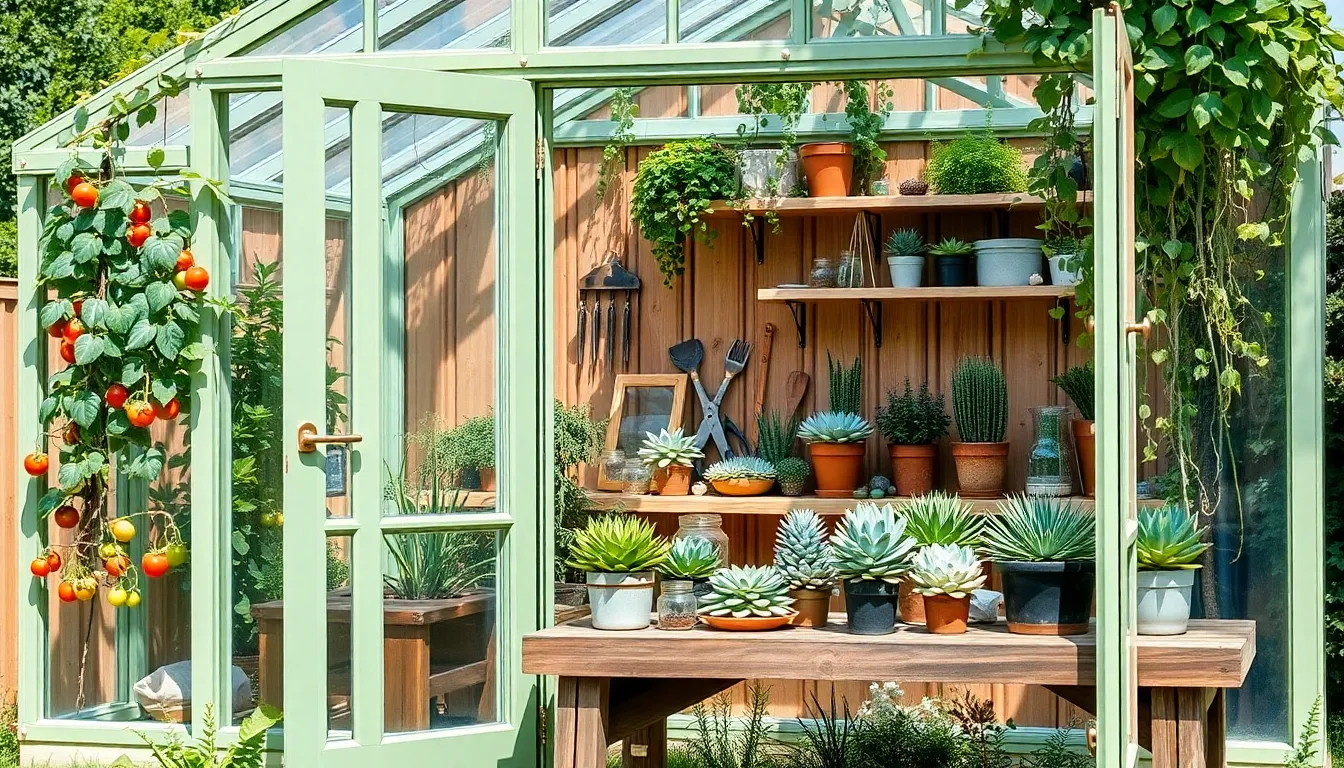
    Arranging and displaying your succulents can transform any space into a vibrant, living art piece. Start by selecting containers that complement each other in style and size, ensuring they all have adequate drainage holes to prevent root rot.

    Next, consider the growing conditions when arranging your succulents, as different varieties have varying light and water needs. Place sun-loving succulents like Echeveria and Sedum in brighter spots, while Aloes and Haworthias can thrive in partially shaded areas.

    Think about creating a visual balance in your display by mixing succulents of different heights, textures, and colors. Use taller succulents like Aeoniums as focal points, and pair them with trailing varieties such as String of Pearls to add dimension and depth to your arrangement.

    To maintain your succulent display, rotate your containers every few weeks to ensure even growth and prevent them from leaning towards the light. Regularly check the soil moisture, and water only when the top inch is dry, which typically means once every two weeks for most succulents, depending on humidity and light levels.

    Conclusion: Growing Success with These Plants

    In exploring the parallels between container gardening with succulents and nurturing healthy relationships, we delved into five key concepts: the importance of choosing the right environment for growth, understanding the balance of independence and togetherness, recognizing the value of patience and time, fostering resilience through diversity, and the significance of mindful nurturing to maintain vitality. By applying these principles, you can cultivate more meaningful and robust connections in your life.

    As an immediate step, consider starting a small succulent garden with a loved one, allowing you to practice these concepts in a tangible way. This shared experience can enhance your bond and serve as a reminder of the care required in relationships.

    Remember, each relationship is a living entity that flourishes with attention and intention. Bookmark this article as a handy guide to revisit these insights whenever you need a gentle nudge towards cultivating loving and enduring relationships.

    Looking ahead, with each mindful action, you are setting the stage for lasting relationship success. Let this newfound understanding empower you to grow both your garden and your relationships with grace and joy. 🌿

  • Best Shrubs for Landscaping

    Best Shrubs for Landscaping

    Gardening is a journey of discovery, and whether you’re just beginning to explore the wonders of the plant world or you’re a seasoned green thumb, the right shrubs can transform your landscape into a vibrant haven. “Best Shrubs for Landscaping” is your trusted companion on this journey, offering a curated selection of plants that promise to bring beauty, structure, and year-round interest to your outdoor space.

    With this guide, you’ll uncover the practical benefits these shrubs provide, from enhancing curb appeal to creating natural privacy screens. Each shrub is chosen for its ease of care, resilience, and ability to thrive in a variety of conditions, ensuring that every gardener can experience the joy of successful planting. Embrace the confidence that comes from knowing your garden can bloom with life and color—no matter your level of expertise.

    Boxwood Shrubs (Versatile Evergreen for Formal Hedges)

    Boxwood Shrubs (Versatile Evergreen for Formal Hedges)

    Boxwood shrubs are renowned for their versatility, making them a popular choice for creating formal hedges. They are evergreen, easy to shape, and thrive in a variety of settings.

    These shrubs prefer well-drained soil with a neutral to slightly alkaline pH. Ensure your boxwoods receive full to partial sunlight, as this promotes healthy foliage and dense growth.

    Watering boxwoods requires attention; they should be watered deeply but infrequently to encourage deep root growth. In dry spells or particularly hot climates, consider adding a layer of mulch to help retain soil moisture.

    For those looking to create formal hedges, regular pruning is essential. Shape your boxwoods in late spring or early summer, and use sharp shears to maintain clean lines and encourage bushy growth.

    Advanced gardeners may want to explore different cultivars, such as ‘Green Velvet’ or ‘Wintergreen’, for specific aesthetic qualities. Regardless of your choice, boxwoods offer a timeless elegance that enhances any landscape.

    Hydrangea Bushes (Vibrant Blossoms for Seasonal Color)

    Hydrangea Bushes (Vibrant Blossoms for Seasonal Color)

    Hydrangea bushes are a popular choice for gardeners looking to add a splash of vibrant color to their landscapes. With a wide array of species offering various bloom colors, from striking blues to soft pinks, hydrangeas provide seasonal interest from spring through fall.

    To ensure your hydrangeas thrive, plant them in a location with morning sun and afternoon shade. They prefer well-draining, rich soil, so consider adding organic matter like compost to improve soil quality before planting.

    Regular watering is crucial, especially during dry spells, as hydrangeas have shallow roots that can dry out quickly. Aim for a watering schedule of about 1 inch per week, adjusting as necessary based on local rainfall and temperatures.

    For those looking to experiment with bloom color, soil pH plays a pivotal role. You can influence the color of certain hydrangea varieties by adjusting the soil’s acidity; more acidic soils tend to produce blue flowers, while alkaline soils yield pink blooms.

    Advanced gardeners might consider pruning techniques to maximize bloom size and plant health. For most hydrangea species, prune back dead stems in late winter or early spring, but avoid cutting back live wood as it may affect the flowering potential.

    Japanese Barberry (Low-Maintenance with Striking Foliage)

    Japanese Barberry (Low-Maintenance with Striking Foliage)

    Japanese Barberry is a fantastic choice for gardeners looking for a low-maintenance shrub with striking foliage. Its vibrant leaves, ranging from deep red to bright yellow, add year-round interest to any landscape.

    For best results, plant Japanese Barberry in a location with full sun to partial shade. This shrub thrives in well-drained soil and can tolerate a variety of soil types, making it versatile for different garden settings.

    Watering needs are minimal; once established, Japanese Barberry is drought-tolerant and resilient. Regular pruning in early spring helps maintain its shape and encourages denser growth, keeping your garden tidy and lush.

    While it’s an excellent choice for beginners, more experienced gardeners can experiment with different cultivars for varied foliage colors and textures. Consider planting Japanese Barberry as a natural hedge or as a striking accent in mixed borders to enhance your garden’s aesthetics.

    Lilac Bushes (Fragrant Blooms for Spring Appeal)

    Lilac Bushes (Fragrant Blooms for Spring Appeal)

    Lilac bushes are a splendid choice for gardeners seeking to add fragrance and visual appeal to their spring landscape. Known for their beautiful, aromatic blooms, lilacs thrive in regions with cold winters, as they require a period of dormancy for optimal flowering.

    When planting lilac bushes, select a location that receives at least six hours of sunlight per day, as they prefer full sun to bloom their best. Ensure the soil is well-drained and slightly alkaline, with a pH level between 6.5 and 7.5, to support healthy growth and vibrant blooms.

    Water lilacs deeply but infrequently, allowing the soil to dry out between waterings to prevent root rot. During the first year, water them once a week; thereafter, they are relatively drought-tolerant and require watering only during dry spells.

    Pruning is essential to maintain the shape and health of your lilac bushes. Remove spent blooms immediately after flowering to encourage more vigorous growth and better blooms the following year, and conduct a more thorough pruning every few years to remove older stems and improve air circulation.

    Juniper Varieties (Drought-Tolerant Options for All Climates)

    Juniper Varieties (Drought-Tolerant Options for All Climates)

    Juniper varieties offer an excellent drought-tolerant option for gardeners in various climates. These resilient shrubs can thrive in diverse soil types, provided they are well-draining. For gardeners looking to add visual interest, junipers come in a range of shapes and sizes, from low-growing ground covers to tall, narrow specimens. Choosing the right variety for your landscape ensures both aesthetic appeal and minimal maintenance.

    Beginner gardeners will appreciate the straightforward care requirements of junipers. Water them deeply, but infrequently, allowing the soil to dry out completely between waterings. To maintain their robust health, plant junipers in a location with full sun exposure. Adequate sunlight not only supports healthy growth but also enhances the vibrant colors of the foliage.

    For those with more experience, consider pruning junipers to encourage denser growth and shape them as desired. It’s best to prune in late winter or early spring before new growth appears. Advanced gardeners might experiment with different juniper varieties, such as the Blue Star or the Skyrocket, to create striking contrasts in their landscapes. Mixing multiple varieties can add depth and texture to any garden.

    To ensure your junipers thrive, amend your soil with organic matter or sand if drainage is an issue. Regularly check the base of the shrubs to prevent waterlogging, which can lead to root rot. Remember, junipers are not just resilient; they’re also quite versatile, making them a valuable addition to any garden seeking drought-tolerant beauty. By following these care tips, gardeners can enjoy lush, healthy junipers that enhance their landscapes year-round.

    Conclusion: Growing Success with These Plants

    In exploring the vibrant world of landscaping, we’ve uncovered five key concepts that resonate deeply with nurturing our personal relationships: the importance of diversity, the value of patience, the necessity of nurturing, the power of boundaries, and the beauty of resilience. Just as a variety of shrubs can create a harmonious garden, so can diversity enrich our interactions, bringing depth and vitality. Patience, much like waiting for a plant to bloom, allows relationships to grow at their own pace. Nurturing, through attention and care, fosters strong connections, while setting healthy boundaries ensures mutual respect and space. Finally, resilience teaches us that with care, even the most challenging relationships can thrive.

    Now, take an actionable step: choose one relationship in your life to apply these principles today. Whether it’s reaching out with understanding or setting a small, healthy boundary, begin nurturing it with intention.

    Don’t let this valuable insight slip away—bookmark this article for future reference. As you cultivate these principles, envision a future where your relationships flourish like a well-tended garden, bringing joy and fulfillment. You have the power to make this vision a reality, one relationship at a time.

  • How to Care for Bonsai Trees

    How to Care for Bonsai Trees

    In the serene world of bonsai, each tiny tree tells a story of patience, artistry, and care. For both the novice gardener and the seasoned horticulturist, cultivating a bonsai offers a unique opportunity to connect with nature on an intimate scale, transforming the practice of gardening into a meditative art form. These miniature trees, with their intricate branches and delicate leaves, are not just plants; they are living landscapes, capable of evoking the grandeur of towering forests within the confines of a small pot.

    Whether you’re just beginning your journey into bonsai or you’ve lovingly tended to them for years, understanding their care is crucial to their health and beauty. This article will guide you through the essentials of bonsai care, from selecting the right species for your environment to mastering the art of pruning and shaping. You’ll discover the delicate balance of watering, the importance of proper lighting, and the secrets to keeping your bonsai thriving through the seasons.

    As we delve into the world of bonsai, you’ll gain the confidence to nurture these remarkable trees, ensuring they bring you joy and tranquility for years to come. With practical tips and expert insights, you’ll learn to appreciate the subtleties that make bonsai care both challenging and rewarding. Embrace the calm and creativity that come with tending to your bonsai, and watch as your efforts bloom into a testament of nature’s resilience and your own dedication.

    Select the Ideal Bonsai Species

    Select the Ideal Bonsai Species

    Choosing the right bonsai species is crucial to your success in bonsai cultivation. Beginners should consider species like Ficus, Jade, or Juniper, which are hardy and forgiving of minor mistakes.

    Ficus bonsai trees are popular due to their adaptability and resilience. They thrive in a wide range of lighting conditions and require well-draining soil to prevent root rot.

    For those with a bit more experience, you might try Japanese Maple or Pine bonsai. These species require more specific care, such as precise watering schedules and seasonal pruning to maintain their shape.

    When selecting a bonsai species, consider your local climate and the environment where you plan to keep your bonsai. Indoor bonsai benefit from species that can tolerate lower light levels, while outdoor bonsai need to withstand your region’s temperature fluctuations.

    Regardless of the species, ensure your bonsai is in the right pot with adequate drainage. Regular watering is crucial, but it’s important to avoid waterlogging; let the topsoil dry slightly between waterings.

    Position in Optimal Light Conditions

    Position in Optimal Light Conditions

    Finding the right light conditions is crucial for the health of your bonsai tree. Most bonsai species thrive in bright, indirect sunlight, making a south-facing window an ideal location for indoor trees.

    For outdoor bonsai, ensuring they receive morning sun and afternoon shade can prevent leaf burn. However, species like junipers and pines prefer full sunlight throughout the day, benefiting from at least six hours of direct sun.

    Monitoring light levels is essential, as too much or too little can stress your bonsai. If you notice elongated growth or pale leaves, consider increasing light exposure by moving your tree to a sunnier spot.

    Conversely, if leaves are scorching or becoming brittle, reduce light intensity by introducing a sheer curtain or relocating it to an area with dappled sunlight. Remember, the key to bonsai success is adapting its environment to mimic its natural habitat as closely as possible.

    Water Consistently with Care

    Water Consistently with Care

    Proper watering is crucial for the health of your bonsai tree, ensuring it thrives in its miniature form. Consistency is key; your bonsai should neither dry out completely nor be overwatered. To achieve this balance, check the soil moisture regularly by inserting your finger about an inch into the substrate. If the top inch feels dry, it’s time to water your bonsai thoroughly, allowing water to drain freely from the bottom of the pot.

    Using the right soil mix can greatly aid in maintaining proper moisture levels. A well-draining bonsai soil mix typically contains a blend of akadama, pumice, and lava rock, which helps prevent waterlogging while still retaining necessary moisture. For beginners, pre-mixed bonsai soil available at garden centers can be a convenient option. More advanced gardeners might experiment with their own soil blends to suit specific tree species and environmental conditions.

    Watering frequency will vary depending on several factors, including the tree species, pot size, and climate. A general rule of thumb is to water your bonsai when the soil appears slightly dry, which may mean daily watering during hot summer months and less frequently in cooler seasons. It’s important to water early in the day to ensure the foliage dries quickly, minimizing the risk of fungal diseases. For those with busy schedules, an automatic drip irrigation system can provide consistent moisture without daily manual intervention.

    Consider the specific needs of your bonsai species, as some trees, such as junipers, prefer slightly drier conditions, while others, like maples, require more moisture. Adjust your watering schedule accordingly and pay close attention to how your tree responds to changes in watering patterns. To further enhance your bonsai care skills, keep a journal to track watering times and observations, helping you refine your technique over time. With attentive care and consistent watering, your bonsai tree will flourish, becoming a beautiful testament to your gardening dedication.

    Prune and Shape Regularly

    Prune and Shape Regularly

    Pruning is an essential practice for maintaining the health and aesthetics of your bonsai tree. Regular pruning helps control growth, ensuring your bonsai remains within the desired shape and size. Start by removing any dead or diseased branches, as these can hinder the tree’s overall health and affect its appearance. Use sharp, clean tools to make precise cuts, reducing the risk of infection.

    For beginners, focus on trimming back new shoots to maintain the shape of your bonsai. Keep an eye out for any branches that grow too long or disrupt the overall design. Advanced gardeners can experiment with techniques like leaf pruning, which involves removing leaves to encourage smaller foliage and more delicate branches. This technique can enhance the miniature effect and add to the tree’s aesthetic appeal.

    Consider the specific species of your bonsai when planning your pruning schedule. Some trees, like junipers, prefer pruning in early spring, while others, such as maples, may benefit from summer trimming. Research the seasonal needs of your bonsai’s species to optimize pruning times. Additionally, shaping with wire can be used to guide the growth of branches. Ensure you check the wire regularly to prevent it from cutting into the bark as the tree grows.

    Maintaining the bonsai’s shape involves more than just cutting back branches. Thinning out dense foliage allows light and air to penetrate the inner sections of the tree, promoting even growth. For those ready to delve deeper, refining techniques like jin and shari can add character to your bonsai. These advanced techniques mimic the natural aging process by stripping bark and creating areas of exposed wood. Always approach these methods with care to avoid stressing the tree.

    Repot to Refresh Soil Periodically

    Repot to Refresh Soil Periodically

    Just as pruning maintains the shape of your bonsai, repotting refreshes the soil and ensures healthy growth. For most bonsai trees, repotting every two years is ideal, but fast-growing species may require annual attention.

    Begin by gently removing the tree from its pot, taking care not to damage the roots. Use a root rake to carefully remove old soil, allowing you to inspect and trim any roots that have become too long or tangled.

    Choose a soil mix that offers excellent drainage, such as a blend of akadama, pumice, and lava rock. This mix helps prevent root rot and ensures the tree receives adequate nutrients and aeration.

    After placing the tree back in its pot, water it thoroughly until you see water draining from the bottom. This helps settle the soil around the roots, eliminating air pockets and supporting strong root development.

    Conclusion: Growing Success with These Plants

    In nurturing a bonsai tree, we uncover five essential relationship insights: patience is vital as growth takes time; attentive listening mirrors understanding the subtle cues of our partners; consistent care fosters strong, lasting bonds; adaptability helps us respond to changing needs, and a deep-rooted foundation ensures resilience through life’s storms. These principles not only guide horticultural success but also enrich our human connections.

    As your next actionable step, choose one of these lessons to consciously implement in your relationships today. Whether it’s practicing patience or enhancing your listening skills, small changes can lead to profound improvements.

    Remember, relationships, much like bonsai trees, require ongoing care and attention. Bookmark this guide as your go-to resource for nurturing both your greenery and your bonds. A thriving relationship garden awaits those who commit to learning and growing.

    Looking forward, envision a future where your relationships flourish, grounded in these timeless principles. Embrace the journey of growth and connection, knowing that with each thoughtful action, you cultivate a more harmonious and fulfilling life. Save this article, and let it be your companion in the art of relationship care.

  • How to Start a Herb Garden in Kitchen

    How to Start a Herb Garden in Kitchen

    Imagine stepping into your kitchen and being greeted by the fresh, invigorating scents of basil, mint, and rosemary, all thriving just a few steps away from your stovetop. Starting a herb garden in your kitchen is not only a delightful way to enhance your culinary creations, but it also brings a touch of nature indoors, even if you don’t have a sprawling backyard. Whether you’re just beginning your gardening journey or have years of green-thumb experience, cultivating herbs indoors offers a unique blend of practicality and pleasure that can transform your cooking and living space.

    For those new to gardening, embarking on this aromatic adventure can seem daunting, but rest assured, it’s far more accessible than you might think. Experienced gardeners will find this endeavor a rewarding way to expand their skills and enjoy fresh flavors all year round. In this article, you’ll discover essential tips on selecting the right herbs, creating ideal growing conditions, and maintaining your mini garden to ensure it flourishes. By the end, you’ll be equipped with the knowledge to nurture a thriving herb garden that will enrich your meals and bring a sense of satisfaction and serenity to your home.

    Select Ideal Indoor Herb Varieties

    Select Ideal Indoor Herb Varieties

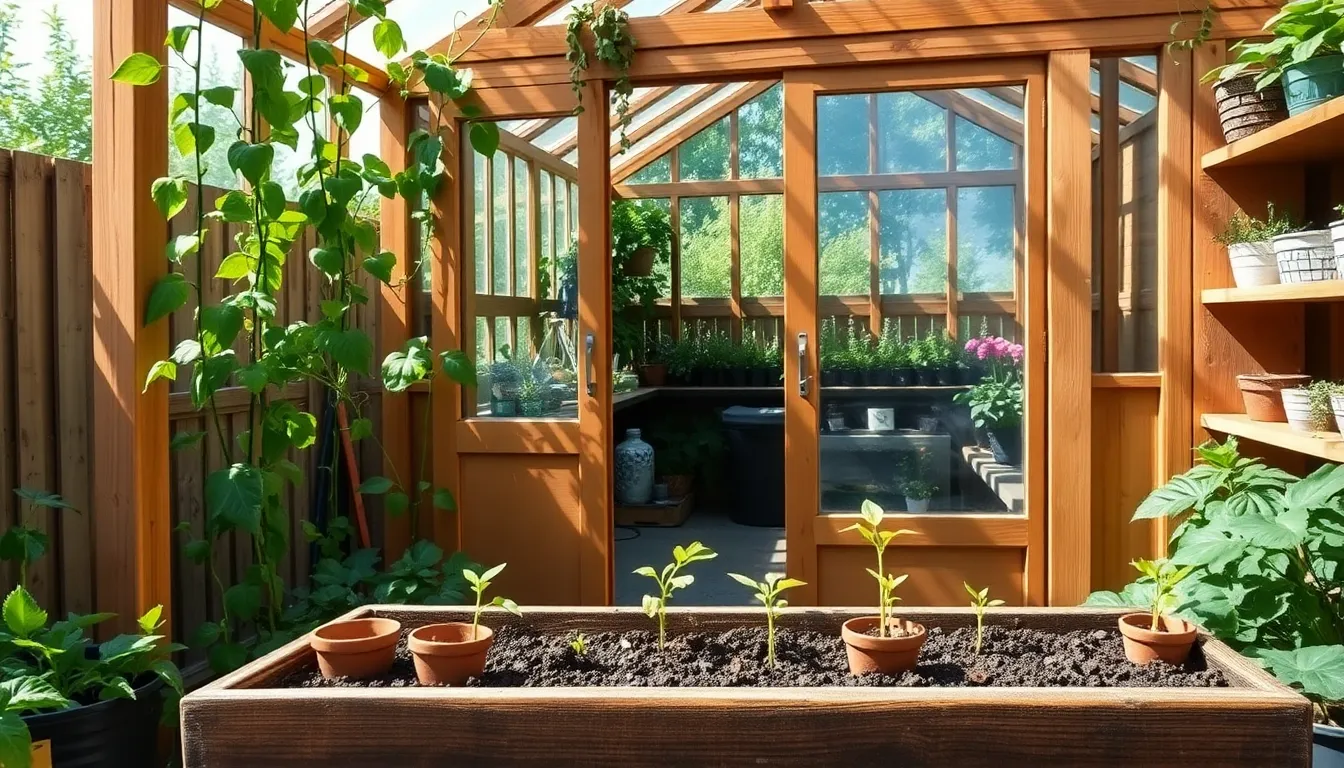
    When selecting herbs for your indoor kitchen garden, consider starting with easy-to-grow varieties like basil, parsley, and mint. These herbs thrive in indoor conditions and are perfect for beginners, as they require minimal care.

    Each herb has unique needs, so it’s vital to tailor your care approach accordingly. For instance, basil thrives in bright sunlight and should be placed on a sunny windowsill, while mint prefers slightly less intense light.

    To ensure your herbs flourish, use a well-draining potting mix to prevent root rot. A mix designed for indoor plants often contains perlite or vermiculite, which helps improve drainage.

    Watering frequency varies depending on your indoor climate and the specific herb. A general rule of thumb is to water when the top inch of soil feels dry to the touch, ensuring that the pot has adequate drainage to avoid waterlogging.

    For those ready to experiment with more challenging herbs, consider rosemary or thyme, which require more precise conditions. These herbs need less frequent watering and benefit from occasional misting to maintain humidity without saturating the soil.

    Advanced gardeners might explore the use of grow lights to supplement natural light, particularly during the winter months. This ensures that your herbs receive the necessary light spectrum to support robust growth and flavor development.

    Find a Sunny Kitchen Spot

    Find a Sunny Kitchen Spot

    Finding the right spot in your kitchen for a herb garden is essential for healthy plant growth. Look for a location that receives at least six hours of direct sunlight per day, such as a south or west-facing window.

    Natural light is crucial for herbs like basil, oregano, and rosemary to thrive. If your kitchen lacks sufficient sunlight, consider supplementing with full-spectrum grow lights to ensure your herbs get the light they need.

    Position your herb pots close to the window, but keep them away from drafts that can stress the plants. It’s important to regularly rotate your pots so that all sides of the plants receive equal sunlight, which prevents leaning and encourages even growth.

    For beginners, using a windowsill herb planter can be a great way to maximize space and sunlight exposure. More experienced gardeners might explore vertical growing systems, which can allow for more variety and efficient use of kitchen space.

    Plant in Suitable Containers

    Plant in Suitable Containers

    Choosing the right containers is crucial for the success of your kitchen herb garden. Make sure to select pots that have good drainage holes to prevent waterlogging, which can harm the roots.

    Opt for containers that are at least six inches deep to give your herbs ample space to grow. This depth is particularly important for herbs like basil and mint, which have more extensive root systems.

    For a touch of creativity, consider using recycled items like old teapots or jars as containers. Just ensure these items are clean and have proper drainage, either by drilling holes or adding a layer of gravel at the bottom.

    When it comes to soil, use a lightweight potting mix that retains moisture without becoming soggy. Adding a bit of perlite or sand can improve drainage and keep your herbs healthy.

    Ensure Consistent Watering Routine

    Ensure Consistent Watering Routine

    Establishing a consistent watering routine is crucial for the success of your kitchen herb garden. Most herbs prefer soil that is kept consistently moist, but not waterlogged, which can lead to root rot.

    Begin by checking the soil moisture with your fingertip; if the top inch of soil feels dry, it’s time to water. A good rule of thumb is to water your herbs about once or twice a week, adjusting based on the specific needs of each plant and the humidity in your kitchen.

    For herbs like basil and mint, which thrive in slightly wetter conditions, consider placing a saucer under the pot to catch excess water and allow the plant to absorb it as needed. Conversely, Mediterranean herbs such as rosemary and thyme prefer drier conditions, so they should be watered less frequently.

    To ensure even watering, consider using a watering can with a narrow spout to target the base of each plant, minimizing water on the foliage. This helps prevent fungal diseases that can occur when leaves remain wet for extended periods.

    • Tip for Beginners: Use a moisture meter for precise readings if you’re unsure about soil moisture levels.
    • Advanced Tip: Group herbs with similar watering needs together to streamline your routine and maintain plant health.

    Harvest Herbs Regularly for Use

    Harvest Herbs Regularly for Use

    To keep your herb garden thriving and productive, it’s essential to harvest herbs regularly. Regular harvesting encourages new growth and prevents your plants from becoming leggy and overgrown.

    When harvesting, aim to snip herbs in the morning when their essential oils are most concentrated. Use sharp scissors or pruning shears to make clean cuts just above a leaf node to promote further growth.

    It’s vital to understand the unique needs of each herb to ensure optimal growth and flavor. For example, basil thrives when you pinch back the top leaves regularly, while rosemary benefits from less frequent, more substantial cuts.

    Consider implementing a rotating harvest schedule to manage your herb garden efficiently. This approach allows you to harvest different herb varieties each week, ensuring a constant supply of fresh greens for your kitchen.

    For those looking to expand their gardening skills, try propagating herbs from cuttings to increase your plant stock. Many herbs, such as mint and oregano, root easily in water or damp soil, providing a cost-effective way to grow your collection.

    • Pinch basil tops weekly to encourage bushier growth.
    • Trim mint and oregano every two weeks to prevent them from becoming invasive.
    • Snip chives about an inch from the soil to promote fresh growth.

    By integrating these techniques into your routine, you’ll not only enhance your garden’s productivity but also enjoy a continuous supply of fresh, aromatic herbs. Remember, a well-maintained herb garden is both a visual delight and a culinary treasure.

    Conclusion: Growing Success with These Plants

    As you embark on the journey of nurturing your kitchen herb garden, remember the five key relationship concepts we’ve explored: cultivating patience, fostering communication, embracing growth, nurturing commitment, and celebrating shared goals. Just as plants need care and attention, so do our relationships. By applying these principles, you not only enhance your green thumb but also enrich your connections with loved ones.

    Your next step? Choose one herb to plant today, and as you tend to it, reflect on how you can apply the same care to your relationships. Whether it’s a rosemary sprig symbolizing remembrance or basil for love, let each leaf remind you of the bonds you’re nurturing.

    Don’t let this valuable information slip away—bookmark this article now for future reference. Let it serve as a gentle reminder of the parallels between gardening and relationships, guiding you toward flourishing connections.

    By embracing these principles, you’re not just growing herbs; you’re cultivating a future of relationship success. Remember, every small action today can lead to a thriving, harmonious tomorrow. Keep this article close, and let it inspire your journey toward deeper, more fulfilling relationships.

  • How to Keep Your Garden Green All Year

    How to Keep Your Garden Green All Year

    There’s something truly magical about stepping into a garden that thrives with vibrant greens, no matter the season. Whether you’re just beginning your gardening journey or have years of experience under your belt, the dream of a lush, year-round garden is within reach. Maintaining that verdant beauty isn’t just about luck; it involves understanding your plants’ needs and making informed choices. With the right strategies, you can transform your garden into an evergreen retreat that delights you all year long.

    In this article, we’ll explore practical tips and insider knowledge to help you keep your garden flourishing, regardless of the weather. You’ll learn about selecting hardy plant varieties, mastering seasonal care routines, and embracing innovative techniques that make year-round greenery achievable. From soil preparation to plant selection, each section is designed to give you the tools you need to succeed. By the end, you’ll have a clear, actionable plan to keep your garden a green oasis, whatever Mother Nature throws your way.

    Select Hardy, Evergreen Plants

    Select Hardy, Evergreen Plants

    When looking to keep your garden lush year-round, it’s essential to choose hardy, evergreen plants that thrive in various conditions. Evergreens like hollies, boxwoods, and junipers are excellent choices, as they maintain their foliage and vibrant appearance even in colder months.

    Position your evergreens strategically to serve as the backbone of your garden design, offering structure and color. For optimal growth, plant them in well-draining soil; these plants generally prefer slightly acidic to neutral pH levels.

    Watering evergreens effectively is crucial, especially when they’re newly planted. Deep watering once a week is recommended, allowing the roots to establish and ensuring resilience through dry periods.

    For beginners, consider starting with boxwoods due to their adaptability and ease of maintenance. Advanced gardeners might explore pruning techniques with junipers, shaping them into unique forms to add interest to the landscape.

    Implement Efficient Watering Systems

    Implement Efficient Watering Systems

    Efficient watering systems are crucial for maintaining a lush garden throughout the year. Investing in a drip irrigation system can help deliver water directly to the roots, reducing evaporation and ensuring that your plants receive the moisture they need.

    For beginners, a simple soaker hose can be a cost-effective solution that lays directly on the soil surface. This setup is easy to install and can be adjusted to ensure even water distribution across your garden beds.

    Advanced gardeners might consider installing an automated irrigation system with timers and moisture sensors. This technology allows you to customize watering schedules based on your garden’s specific needs, such as soil type and plant species.

    Remember to regularly check your system for clogs or leaks, particularly after seasonal changes. Maintaining your equipment ensures that your watering system operates efficiently and continues to support your garden’s health year-round.

    Apply Seasonal Fertilizers Regularly

    Apply Seasonal Fertilizers Regularly

    Regular application of seasonal fertilizers can significantly enhance your garden’s health and vitality. As the seasons change, so do the nutritional needs of your plants, making it crucial to adjust your fertilization strategy accordingly.

    In spring, opt for a fertilizer high in nitrogen to support leafy growth, especially for vegetables and leafy greens. A balanced 10-10-10 fertilizer is an excellent choice for general use, ensuring that your plants have access to all essential nutrients.

    During the summer months, focus on fertilizers that boost flowering and fruiting, such as those higher in phosphorus. Flowering plants and fruit-bearing shrubs particularly benefit from this, as phosphorus supports root development and enhances bloom quality.

    As fall approaches, switch to a fertilizer with higher potassium content to prepare your plants for the colder months. Potassium strengthens root systems and enhances the plant’s ability to withstand frost, making it an essential component for perennials and winter crops.

    • Test your soil before applying fertilizers to avoid over-fertilization, which can harm plants.
    • Ensure even distribution by using a broadcast spreader for large areas or a handheld spreader for smaller plots.
    • Water thoroughly after applying granular fertilizers to help them dissolve and reach the root zone.

    Prune and Mulch for Health

    Prune and Mulch for Health

    Pruning is a crucial task that promotes healthy growth and prevents disease in plants. Regularly removing dead or diseased branches ensures that your plants focus their energy on new, healthy growth.

    Timing is essential when it comes to pruning, as it varies with different plant types. For most flowering plants, prune just after they bloom, while for shrubs like roses, late winter or early spring is ideal.

    Using the right tools is equally important to achieve clean cuts and avoid plant damage. Ensure your pruning shears are sharp and clean to minimize the risk of spreading plant diseases.

    Mulching serves as an excellent way to retain soil moisture and suppress weeds in your garden. Choose organic mulches like bark chips or straw, which decompose over time and enrich the soil with nutrients.

    A layer of mulch, about 2 to 3 inches thick, is generally sufficient to provide insulation and protection. Keep mulch a few inches away from plant stems to prevent rot and allow for proper airflow.

    In addition to these benefits, mulch can also regulate soil temperature, keeping roots cooler in summer and warmer in winter. By adjusting these techniques to suit your garden’s needs, you can help ensure healthy, thriving plants year-round.

    Protect Plants from Harsh Weather

    Protect Plants from Harsh Weather

    Protecting your plants from harsh weather is crucial to maintaining a vibrant garden year-round. Start by using frost cloths or blankets to shield delicate plants from cold snaps and sudden frost.

    In addition to coverings, consider applying a layer of mulch around the base of your plants to insulate the soil and retain moisture. This simple step can prevent roots from freezing and help maintain a stable ground temperature.

    For regions prone to strong winds, it’s wise to set up windbreaks using structures like fences or hedges. This not only protects your plants from physical damage but also reduces moisture loss in the soil.

    Watering schedules should be adjusted during extreme weather conditions. In hot, dry spells, water your plants deeply but less frequently to encourage deeper root growth, and always do so early in the morning or late in the afternoon to minimize evaporation.

    Advanced gardeners can use row covers or cold frames to create microclimates that extend the growing season. These structures are particularly useful for growing temperature-sensitive plants in variable climates.

    Conclusion: Growing Success with These Plants

    As we conclude our journey through ‘How to Keep Your Garden Green All Year,’ let’s revisit the five essential relationship concepts we’ve explored. First, we discussed the importance of regular communication, akin to watering your garden, to nurture understanding and connection. We then delved into the necessity of mutual respect, serving as the sunlight that allows love to flourish. Third, we highlighted the value of shared goals, planting seeds for a future cultivated together. Fourth, we examined conflict resolution, the pruning required to promote healthy growth. Lastly, we embraced the power of gratitude, the fertilizer that enriches your bond.

    Now, let’s take immediate action: choose one concept to focus on today. Perhaps it’s initiating a heartfelt conversation or planning a small gesture of appreciation. These small steps can lead to profound transformations.

    Remember, relationships, just like gardens, require ongoing care and attention. Bookmark this article to revisit these strategies whenever you need a reminder or a boost. By committing to these principles, you’re setting the stage for a thriving relationship that can weather any season. Here’s to your success in cultivating a love that remains vibrant and resilient all year long!

  • How to Create an Edible Garden

    How to Create an Edible Garden

    Imagine stepping into your backyard and picking a sun-ripened tomato straight from the vine or plucking fresh basil for tonight’s dinner. An edible garden not only turns this dream into reality but also transforms your outdoor space into a lush, sustainable pantry full of flavors and fragrances. Whether you’re just beginning your gardening journey or have years of experience tending to your green sanctuary, cultivating an edible garden offers an enticing way to connect with the earth and enjoy the fruits of your labor—literally.

    Creating an edible garden is more than just a hobby; it’s an empowering step towards self-sufficiency and a deeper appreciation for the food you consume. This guide will walk you through the essentials, from selecting the right plants for your climate to crafting a garden layout that maximizes both space and yield. You’ll discover the joy of nurturing plants that will reward you with fresh produce, all while gaining practical tips to ensure your garden thrives.

    As you delve into the world of edible gardening, you’ll learn to balance beauty with functionality, making your space both productive and visually appealing. We’ll explore how to tailor your garden to your unique needs, whether that means growing a small herb patch or an expansive vegetable plot. By the end of this article, you’ll be equipped with the knowledge and confidence to start or enhance your own edible oasis, turning your garden into a testament to your dedication and love for homegrown goodness.

    Select Suitable Edible Plants

    Select Suitable Edible Plants

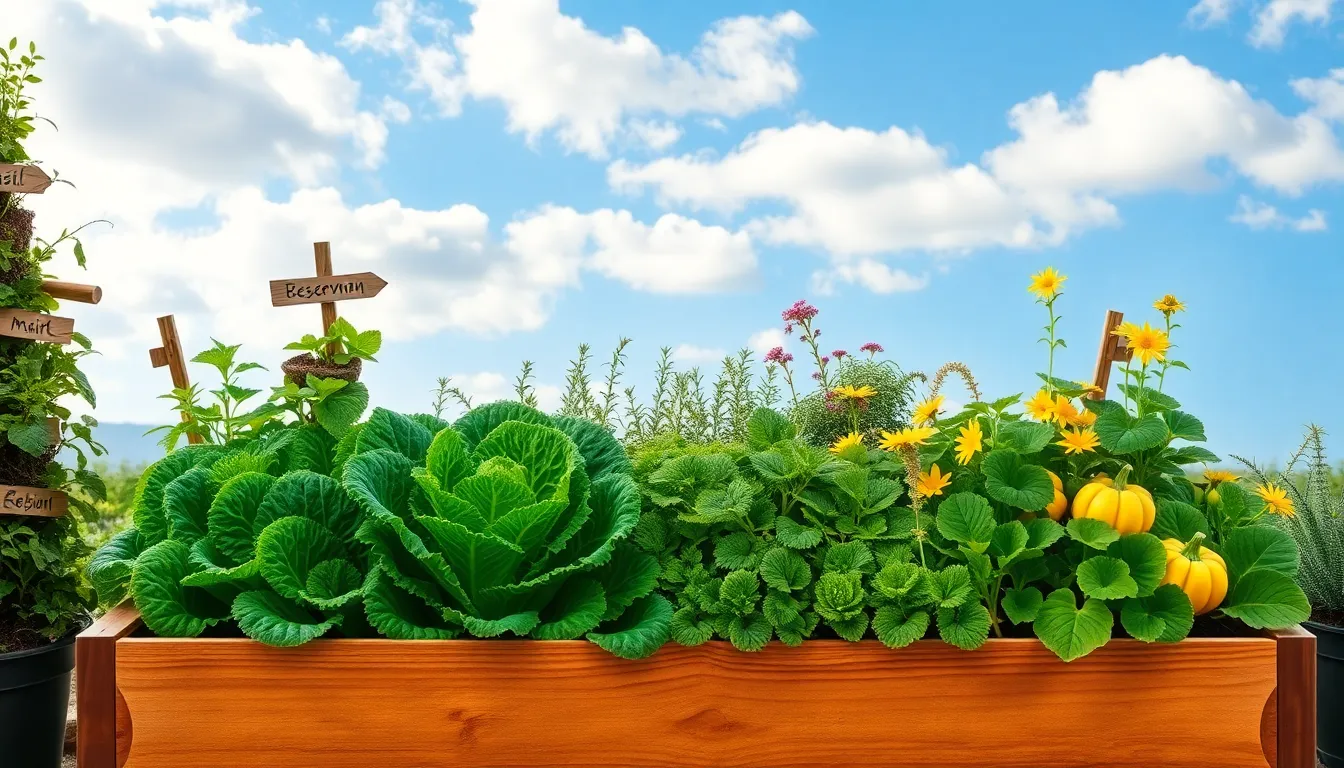
    Begin by choosing edible plants that suit your climate and garden conditions to maximize success. Consider starting with herbs like basil, mint, and parsley, which are generally easy to grow and thrive in a variety of environments.

    Understanding your garden’s sunlight levels is crucial for selecting the right plants. Leafy greens such as lettuce and spinach prefer partial shade, while fruiting plants like tomatoes and peppers flourish in full sun.

    Soil quality is another important factor, with most edible plants needing well-draining, nutrient-rich soil. You can enhance your soil by incorporating organic matter, such as compost or aged manure, to improve fertility and structure.

    For gardeners looking to cultivate more challenging plants, consider trying asparagus or artichokes, which require more patience and care. These perennials need well-drained soil and consistent watering but reward growers with unique and delicious harvests over several years.

    Design Your Garden Layout

    Design Your Garden Layout

    When designing your garden layout, consider starting with a simple sketch of your available space. This helps you visualize where each plant should go, ensuring they receive the necessary sunlight and spacing they require to thrive.

    Begin by grouping plants with similar water and sunlight needs to make maintenance easier. For instance, herbs like basil and rosemary prefer full sun, while leafy greens such as lettuce and spinach can tolerate partial shade.

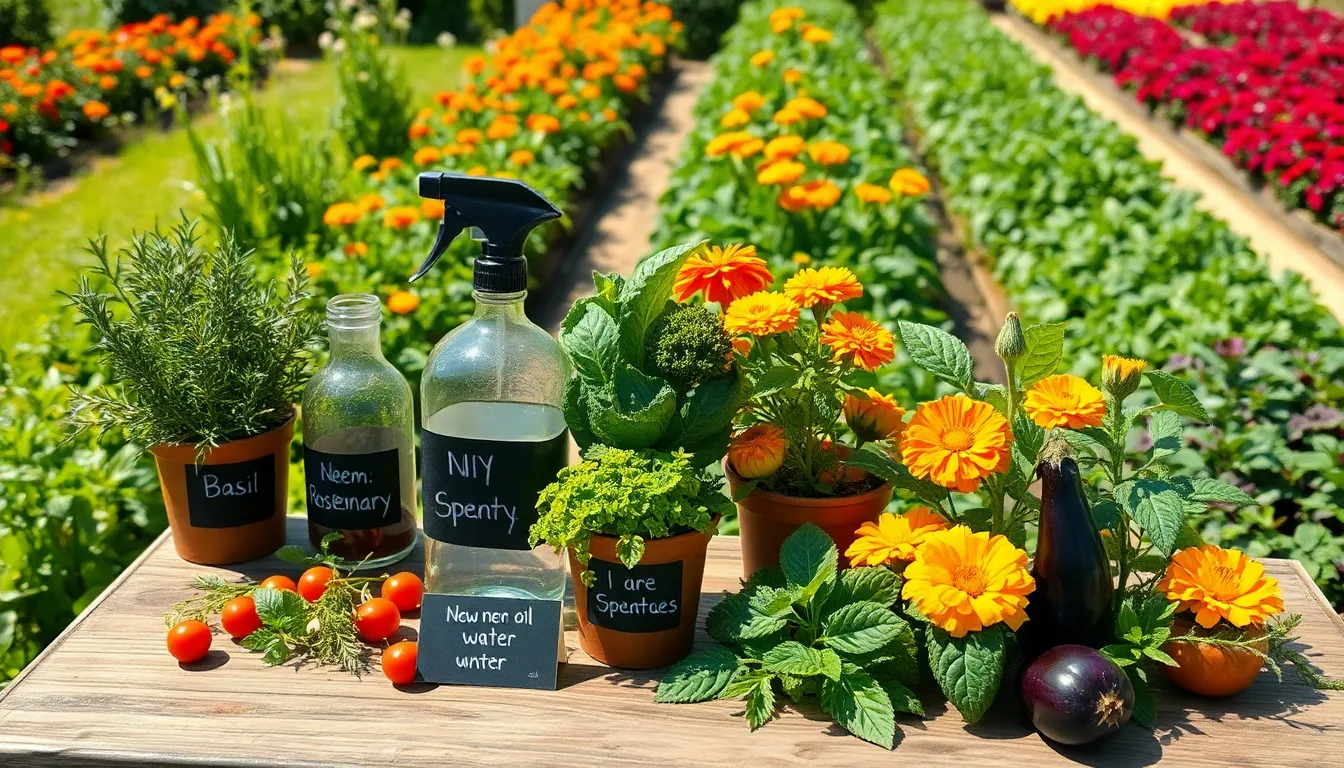
    Use companion planting techniques to naturally boost plant growth and deter pests. For example, planting marigolds near tomatoes can help discourage nematodes, while beans and corn can be grown together for mutual benefits.

    Consider the mature size of your plants to avoid overcrowding and ensure each plant has ample room to grow. As a rule of thumb, place taller plants like corn or sunflowers at the back of your garden or in areas that won’t shade smaller plants.

    For those with limited space, vertical gardening can be a game-changer. Use trellises for climbing plants such as peas and cucumbers, which can maximize yield without taking up much ground space.

    Prepare the Soil with Compost

    Prepare the Soil with Compost

    Once your garden layout is ready, it’s time to focus on preparing the soil with compost. Compost is a fantastic way to enrich your garden’s soil, providing essential nutrients and improving soil structure.

    Begin by selecting a good-quality compost, which can be homemade or store-bought. Ensure it is well-rotted and crumbly, as this indicates it’s ready to use and beneficial for your plants.

    Spread a generous layer of compost, about 2-3 inches thick, over the entire area where you plan to plant. This helps improve soil fertility and encourages beneficial microbial activity.

    Next, incorporate the compost into the top 6-8 inches of soil using a garden fork or tiller. This process aerates the soil and ensures that your plants’ roots have access to the nutrients they need.

    For advanced gardeners, consider testing your soil’s pH and nutrient levels before adding compost. This allows you to adjust the compost blend or add specific amendments if necessary, ensuring optimal growing conditions for your edible garden.

    Plant Seeds or Seedlings

    Plant Seeds or Seedlings

    When deciding whether to plant seeds or seedlings, consider your experience level and the time you can dedicate to your garden. Seeds offer a cost-effective way to grow a variety of plants, but they require patience and nurturing to germinate successfully.

    Beginners might find seedlings more forgiving, as they provide a head start and reduce the risk of common seedling diseases. Transplanting seedlings is a straightforward process—just ensure you plant them at the same depth they were growing in their starter pots.

    It’s crucial to understand the specific needs of the plants you choose, whether starting from seeds or seedlings. Some plants, like tomatoes and peppers, thrive when started indoors as seeds and moved outdoors as seedlings when the weather warms.

    Ensure the soil is well-drained and rich in organic matter to support the growth of both seeds and seedlings. Consistent watering is vital—keep the soil evenly moist but not waterlogged to prevent rot and promote healthy root development.

    Implement Watering and Care Routine

    Implement Watering and Care Routine

    Once your seeds or seedlings are comfortably in the ground, it’s crucial to establish a consistent watering routine. Most edible plants prefer the soil to be consistently moist, but not waterlogged, so aim to water them deeply once or twice a week, depending on rainfall and climate conditions.

    Incorporating mulch around your plants can significantly help in retaining soil moisture and reducing the need for frequent watering. Organic mulches like straw, wood chips, or shredded leaves not only retain moisture but also improve soil health as they decompose.

    Monitor the weather and adjust your watering schedule accordingly, especially during periods of intense heat or drought. Use a moisture meter or simply check the soil with your finger; if the top inch is dry, it’s time to water.

    For beginner gardeners, an automated drip irrigation system can be a worthwhile investment, ensuring your plants receive consistent moisture without the guesswork. More experienced gardeners might opt for hand-watering, allowing them to inspect each plant closely and address any issues like pests or diseases. Remember, overwatering can be just as harmful as underwatering, so aim for balance.

    Conclusion: Growing Success with These Plants

    In creating an edible garden, the key relationship concepts we explored include nurturing communication, patience, shared goals, emotional investment, and adaptability. Just as plants require consistent attention and understanding, a thriving relationship demands open dialogue and the patience to grow together through life’s seasons. Setting mutual goals, whether in the garden or in love, fosters unity and purpose, while emotional investment deepens bonds. Adaptability allows couples to weather change, enhancing resilience and connection.

    As a practical next step, why not start a small herb garden together? It’s a simple yet rewarding project that embodies these principles and offers a daily reminder of your shared journey.

    Remember, relationships flourish with care and commitment. Bookmark this article now, so you can revisit these insights whenever you need a reminder of how to cultivate love and connection. As you nurture both your garden and your relationship, know that success lies in the shared experiences and growth you cultivate together. Here’s to a future where your love, much like your garden, thrives abundantly.

  • How to Control Weeds Naturally

    How to Control Weeds Naturally

    Imagine stepping into your garden, where every plant thrives in harmony, unbothered by pesky intruders. Whether you’re nurturing your first vegetable patch or maintaining a seasoned perennial border, weeds can often feel like relentless foes. These opportunistic plants not only compete for vital nutrients and sunlight but can also detract from the beauty and productivity of your cherished green space. Fear not, for controlling weeds naturally is not only achievable but can also enhance your connection with the earth.

    In this article, we’ll explore effective, eco-friendly strategies that respect both your plants and the planet. You’ll learn how to harness the power of organic mulch, strategic planting, and simple homemade remedies to keep those unwelcome guests at bay. For beginners, we’ll demystify the basics of weed control, providing you with simple, actionable tips to get started. Meanwhile, seasoned gardeners will discover fresh insights and innovative techniques to enhance their existing practices.

    Embracing natural weed control methods means working with nature, not against it, fostering a garden that’s as kind to the environment as it is to the eyes. By the end of this journey, you’ll feel empowered to turn your garden into a thriving, weed-free paradise using methods that are safe, sustainable, and satisfying. So, roll up your sleeves and prepare to dig deep into the art of natural weed management—your garden will thank you for it!

    Identify Common Weed Types

    Identify Common Weed Types

    Weeds can be a gardener’s nemesis, but understanding their types makes management easier. **Broadleaf weeds**, like dandelions and clover, are easily identified by their wide leaves and tend to thrive in nutrient-rich soils.

    Grassy weeds, such as crabgrass, resemble grass and often invade lawns with poor maintenance. To control these, regular mowing and proper lawn care, including aeration and overseeding, can be effective.

    Sedge weeds, like nutsedge, are distinguishable by their triangular stems and thrive in moist, compacted soils. Improving soil drainage and reducing overwatering can help keep these weeds at bay.

    For those dealing with perennial weeds like bindweed, persistence is key since they can regrow from fragments left in the soil. Regularly pulling them out by the roots and using mulch to block sunlight are effective natural control methods.

    Mulch to Suppress Growth

    Mulch to Suppress Growth

    Mulching is an effective strategy to naturally suppress weed growth in your garden. By covering the soil with a layer of mulch, you limit sunlight access, which is crucial for weed seed germination.

    Choose organic mulches like straw, wood chips, or shredded leaves for a dual purpose: weed suppression and soil enrichment. These materials decompose over time, adding nutrients back into the soil, making them a sustainable choice for both beginners and experienced gardeners.

    For best results, apply a layer of mulch that is at least two to three inches thick. This depth is necessary to effectively block light and prevent weed seeds from sprouting, especially during the growing season.

    Keep the mulch away from plant stems and trunks to reduce the risk of rot and disease. This tip is essential for maintaining plant health, particularly in damp climates where moisture retention could lead to problems.

    Advanced gardeners might consider using landscape fabric under the mulch for additional control in severely weed-prone areas. This method provides a physical barrier, enhancing the mulch’s effectiveness while still allowing water and nutrients to reach the soil.

    Hand-Pull Weeds Regularly

    Hand-Pull Weeds Regularly

    Regular hand-pulling of weeds is a simple yet effective way to maintain a healthy garden. By removing weeds before they flower and set seed, you can prevent them from multiplying and spreading further.

    For best results, aim to pull weeds after a rain when the soil is moist, as this makes it easier to remove the roots completely. If the soil is dry, consider watering the area lightly before pulling to loosen the soil and help the roots come out intact.

    When hand-pulling, ensure you grasp the weed close to the base to remove the entire root system. This is crucial because leaving any part of the root in the ground can allow the weed to regrow.

    Beginner gardeners should focus on identifying common weeds like dandelions and crabgrass, which are easier to spot and remove. Experienced gardeners might recognize trickier weeds, such as bindweed, which require more persistence and attention.

    To make hand-pulling less of a chore, incorporate it into your routine by spending a few minutes each week in the garden. Consistency is key to keeping weed populations under control and ensuring your plants have access to vital nutrients and sunlight.

    Utilize Natural Weed Barriers

    Utilize Natural Weed Barriers

    Natural weed barriers can be a gardener’s best friend in the fight against unwanted plants. By using organic materials like mulch, straw, or wood chips, you can effectively smother weeds while nourishing your soil. Mulching not only helps to suppress weeds but also retains soil moisture, reducing the need for frequent watering. Choose mulches that are suitable for your climate and plant types, such as bark for perennials or straw for vegetable gardens.

    Another effective method is using cover crops, which can outcompete weeds and improve soil fertility. Plants like clover, rye, or vetch can be sown in fallow areas to create a dense ground cover. Cover crops not only suppress weeds by denying them sunlight but also add valuable nutrients back into the soil when tilled under. This technique is particularly beneficial in larger gardens or plots that are resting between growing seasons.

    For a more permanent solution, consider installing landscape fabric under your mulch. This fabric acts as a physical barrier, blocking sunlight and preventing weeds from germinating. Ensure that the fabric is breathable to allow water and nutrients to reach your plants’ roots. Advanced gardeners might use this technique in conjunction with drip irrigation systems to maximize efficiency in water usage.

    Experiment with planting densely to create a living mulch that naturally suppresses weeds. By selecting companion plants that thrive together, you can create a thriving ecosystem that leaves little room for weeds to take hold. This approach not only reduces weed growth but also enhances biodiversity, attracting beneficial insects and improving overall plant health. With these natural barriers, you can enjoy a lush garden with minimal weed invasion and chemical use.

    Introduce Beneficial Ground Covers

    Introduce Beneficial Ground Covers

    Ground covers are a fantastic way to naturally control weeds while enhancing the beauty of your garden. These low-growing plants effectively compete with weeds for sunlight, water, and nutrients, reducing the space and resources available for weed growth.

    Consider planting creeping thyme, which thrives in well-drained soil and full sun. This aromatic herb not only suppresses weeds but also adds a delightful fragrance and blooms with tiny purple flowers in the summer.

    For shaded areas, sweet woodruff is an excellent choice, flourishing in moist, well-drained soil. Its delicate white flowers and lush green foliage will brighten shaded spots while outcompeting weeds for vital resources.

    More advanced gardeners might experiment with using clover as a ground cover, which not only controls weeds but also enriches the soil by fixing nitrogen. Regular mowing and occasional watering during dry spells can keep clover healthy and productive, benefiting the overall garden ecosystem.

    Conclusion: Growing Success with These Plants

    In navigating the lush garden of relationships, we’ve explored five key concepts to naturally manage the weeds of discord: active listening, empathy, setting boundaries, mutual respect, and ongoing communication. Each of these pillars plays a vital role in cultivating a flourishing partnership. By actively listening, you tune into your partner’s needs; through empathy, you foster deeper connections; setting boundaries ensures respect and safety; mutual respect forms a solid foundation; and ongoing communication keeps love thriving.

    As an immediate next step, take a moment today to practice active listening in your next conversation. Notice the difference it makes when you truly hear your partner.

    Remember, the journey of nurturing a relationship is ongoing. Save or bookmark this article as a valuable resource in your relationship toolkit. With these insights at your fingertips, you’re well-equipped to navigate challenges and cultivate a resilient bond.

    Looking ahead, embrace the promise of relationship success by implementing these natural strategies. As you do, you pave the way for a vibrant, enduring partnership that stands the test of time. Your garden of love awaits—tend to it with care.